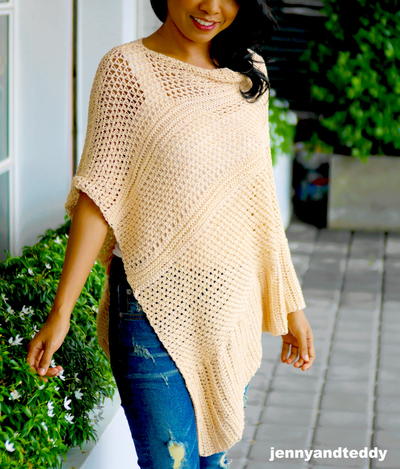
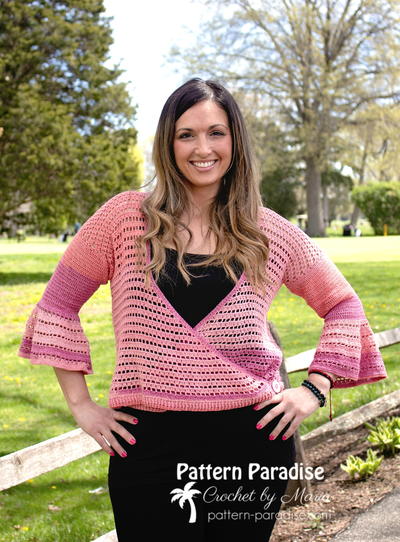
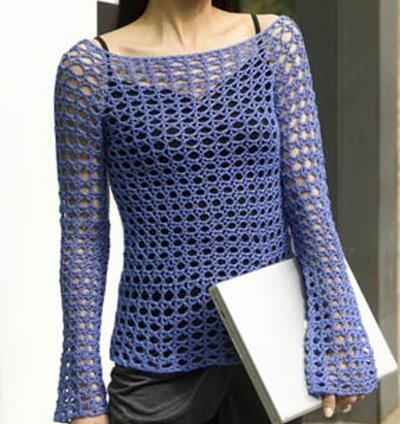
Delicate Open Weave Top Crochet Pattern
Learn open weave crochet with this pretty pattern.

The crochet instructions for this Delicate Open Weave Top are easy to follow. Make yourself a fabulous top to wear any time of year; wear a tank during the summer or a long sleeved shirt during the winter. Complete the top with a fancy belt.
Below is the full pattern and a video tutorial! Whether you're a visual learner or prefer the simplicity of the written pattern, you should be able to work up this top.
Want a convenient printable PDF?
Download the PDF here.

Crochet HookF/5 or 3.75 mm hook, G/6 or 4 mm hook
Yarn Weight(0) Lace (33-40 stitches to 4 inches). Includes crochet thread.
Materials List
- Measuring Tape
- 100% Cotton yarn
- Crochet hooks G & F
- Yarn Needle
- Needle and Thread
- Pen/pencil & paper (to write down measurements, number of stitches, etc.)
Pattern
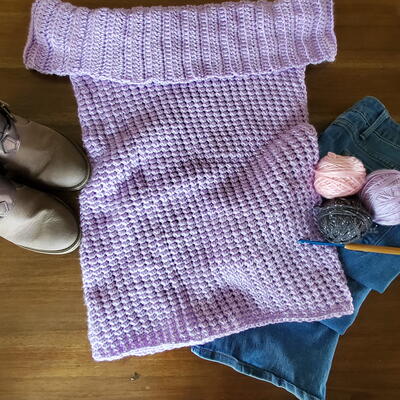
To Begin: (Front and Back Pieces are Made Identical)
Measure from your elbow, up shoulder across neck and down to other elbow.
Chain number required to measure the above measurement (if you measure 35 inches, Chain length of 35 inches)
-
Row One: Single Crochet in each chain (this forms the base), Turn
-
Row Two: Chain 4, Skip 3 stitches, Double Crochet in 4th Stitch, Repeat for entire length, Turn
-
Row Three: Chain 4, Double Crochet in the Chain 4 space, Repeat for entire length, Turn
-
Continue Repeating Row 3 until your piece is at desired length ( Hold piece up to your neck to see if it is as long as you'd like it)
-
Once you have reached your desired length, Turn
Finishing
Single Crochet in Every Chain Across, Knot, Bury Ends. (Repeat for Back)
Joining Shoulder Seams
-
Measure your neck opening and mark on pieces with marker or pins.
-
With Front & Back Together, line up stitches and slip stitch between front and back stitches from end of arm length to neck opening. Knot and bury ends
-
Repeat both sides of neck opening.
Joining Side Seams
-
Place Front & Back side by side on flat surface and line up the stitches.
-
Thread Needle with Matching Thread.
-
Sew side seams by weaving your thread from right to left sides, connecting and burying your threads.
-
Continue to desired arm hole measurment.
-
Knot and bury ends. Repeat for other side.
-
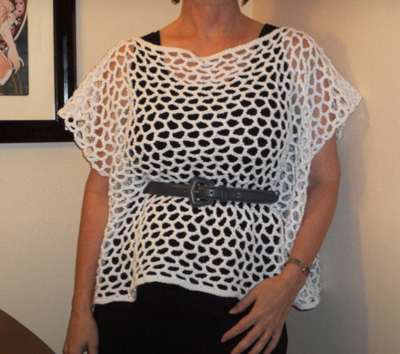
Press your top, and/or steam, which will help your completed top lay flat.
-
Picture shown uses a thin belt weaved through the open weave for a stylish effect.
Watch the video tutorial below!
Up Next:
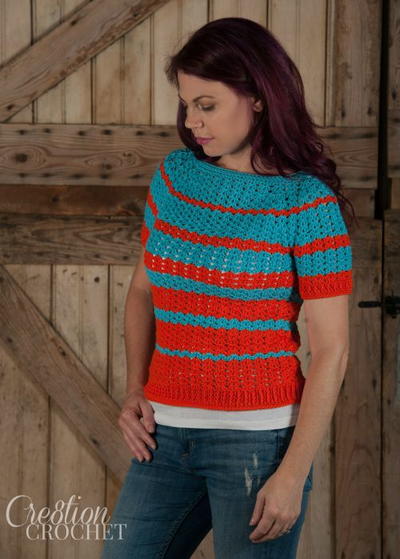
Read NextRibbed Shell Tee
Your Recently Viewed Projects
Thanks for your comment. Don't forget to share!
Delphine Bryant
Sep 23, 2018
This is what I call a great crochet project. Items like this are very versatile and depending on the color of yarn you use, this could easily be an article dedicated to any or all seasons. Try making this in some light and fruity color for the summer and spring and a earthy and dark for the fall and winter months. This would also be a great gift.
Morehouse17
Aug 16, 2018
For those of you that are just learning the craft of crochet, this is a great beginner project. The directions are simple and having to make two identical pieces and joining them will allow you to make this adorable top. Accomplishing a project makes you want to learn more and at the end of the day, you will have a great piece to add to your wardrobe.
princess6860504
Jun 23, 2018
This is a great all purpose pattern for me! I have used this basic idea many times. I have used Mandala yarn (Lion Brand, LOVE!)to make an almost Skittles rainbow colored one for a good friend of mine for Pride Month. I do not have a picture on this computer, or I would share it! These open mesh designs work up super fast!
Hippie Chick
Jun 14, 2017
This is a great top and a great pattern. This is the sort of top that can be worn on almost any occasion because it is worn as an accessory piece on top of other clothing items. Cotton yarn is great and allows you to wear it in the summer months when it is hotter. Very easy stitches to crochet makes this work up quickly.
princess6860504
Feb 22, 2017
This is a great pattern because you don't have to worry about adjusting the pattern- all you do is measure yourself elbow up shoulder across neck, then down to other elbow! It is designed for a custom fit. This is gorgeous for a swimsuit cover-up because it states you can make as many rows as needed to reach your desired length! It can't be more perfect.
Fairfax Avenue
Dec 29, 2013
This is a versatile design. I liked it as published but I adjusted the design to shoulder width and made a sleeveless top that fits close to the body. I toss it on over a tee (no belt needed) and feel much more dressed up.
Melanieyaya487
Jul 19, 2013
First of all here's a link to a yarn weight chart: http://www.craftyarncouncil.com/weight.html Second the pattern doesn't specify yarn amount because it will vary based on your personal measurements. I just don't think the picture looks like lace weight yarn. It look more like a 4 to me, but you could certainly use a 2 or 3. I don't think I could use a G/6 with lace weight. I'm going to give it a try using some Sugar 'n Cream (4) that I've got with a G/6 and see what happens.
carriehawk48 01726 66
May 21, 2013
I love this top. I am trying to make it, but need a bit more information about the size of the yarn and the amount of yarn. Does anyone have any ideas about this?
planenut1987 81412 04
Dec 06, 2012
It looks like it could be adapted to any thin yarn, since it goes by measurements instead of guage. I picked up some beautiful yarn at a close out sale, about the same weight as lustersheen, and was looking for a pattern to do something with it. This will do nicely. I love patterns by measurement instead of guage because you can adapt it to any yarn - just make up a couple samples until it looks pleasing
Crafter 17792
Dec 04, 2012
I have been to several yarn stores and they all say that there is NO Yarn that is a size"0"., even crochet thread, so EXACTLY was the brand of yarn used in this item? I love it and want to make several but until we find out the brand of yarn AND the amount needed(to make general sizes like S-M-L-XL) we are all stuck...PLEASE HELP!!
ConiCuts
Aug 08, 2012
Maybe I'm missing it, but where does it say how much yarn/thread is needed? Yardage?
amess
Oct 27, 2011
This reminds me of a swimsuit cover up. I really don't see this as a maternity top.
gracegrant 0777547
Oct 27, 2011
I like the basic style of this top, however would prefer to see it done in a more intricate stitch pattern and made out of a finer thread with more body and weight. The one pictured looks as though it would be a bit stiff and rigid. A definite yes to the belt.
lbeddow 9415212
Oct 25, 2011
I love this! I wish I'd had the pattern for the summer, but will definately plan to make it for next summer. I think would be very versatile for many fashion statements. Thanks!
ImHis
Oct 24, 2011
I do like it and looking for something like this will try out the pattern. many thanks for posting this!
Member 1012419
Oct 24, 2011
I like the light airy look of it. I think I would wear it both ways. With a belt and without Ginny
Sierra Sue
Oct 24, 2011
I love it ! Thinking of making it in either red or purple-why? It would be great to wear over a shirt or t-neck sweater for our Red Hats gathering ! Thanks so much !
keithsgirl1977
Oct 24, 2011
I love the pattern, it looks amazing. I'm goin to try it and also make the different colored belts as suggested. Thank you for posting!!
Crafter 20800
Oct 24, 2011
Like very much and would look great as a swim suite cover by making it longer.
Iolite
Oct 24, 2011
Love the design and easy pattern. However, if I wear something like this, I would not put on ready-made belt. I would take time to crochet several different colored belts for a selection of any outfit I choose to wear.
Report Inappropriate Comment
Are you sure you would like to report this comment? It will be flagged for our moderators to take action.
Thank you for taking the time to improve the content on our site.