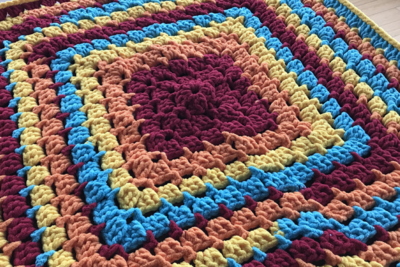
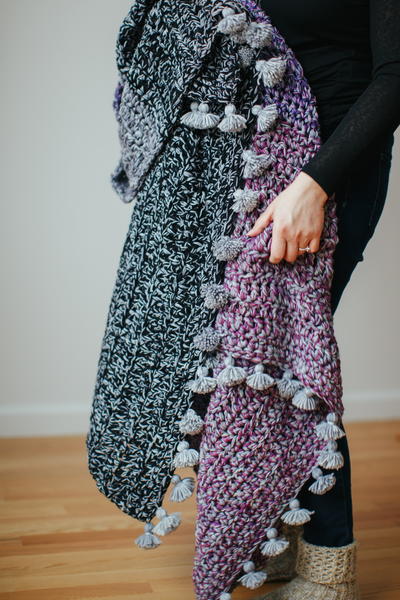
Log Cabin Arrow Crochet Afghan Pattern
The Log Cabin Arrow Crochet Afghan Pattern may look very intimidating, especially to a beginner, but in reality it's an easy crochet pattern to work up. With 11 crochet colors involved you'll find yourself mesmerized as your work up the afghan. 24 squares are worked individually with the log cabin style and then joined together following a diagram. This is certainly one easy crochet afghan pattern you'll want to display in your home for all to see.

Crochet HookJ/10 or 6 mm hook
Yarn Weight(4) Medium Weight/Worsted Weight and Aran (16-20 stitches to 4 inches)
Materials:
- 136-135 Heartland Yarn: Yosemite 1 ball Note: (A)
- 136-398 Heartland Yarn: Acadia Tweed 1 ball Note: (B)
- 136-369 Heartland Yarn: Shenandoah Tweed 1 ball Note: (C)
- 136-158 Heartland Yarn: Yellowstone 1 ball Note: (D)
- 136-373 Heartland Yarn: Everglades Tweed 1 ball Note: (E)
- 136-103 Heartland Yarn: Denali 1 ball Note: (F)
- 136-353 Heartland Yarn: Black Canyon Tweed 1 ball Note: (G)
- 136-153 Heartland Yarn: Black Canyon 1 ball Note: (H)
- 136-389 Heartland Yarn: Isle Royale Tweed 1 ball Note: (I)
- 136-109 Heartland Yarn: Olympic 1 ball Note: (J)
- 136-180 Heartland Yarn: Kings Canyon 1 ball Note: (K)
- Lion Brand Crochet Hook - Size J-10 (6 mm)
- Lion Brand Large-Eye Blunt Needles (Set of 6)
- Diagram
GAUGE:
14 hdc = about 4 in. (10 cm).
1 square = about 9 3/4 x 9 3/4 in. (25 x 25 cm).
When you match the gauge in a pattern, your project will be the size specified in the pattern and the materials specified in the pattern will be sufficient. The needle or hook size called for in the pattern is based on what the designer used, but it is not unusual for gauge to vary from person to person. If it takes you fewer stitches and rows to make your swatch, try using a smaller size hook or needles; if more stitches and rows, try a larger size hook or needles.
NOTES:
1. 24 Squares are worked individually.
2. Each Square is worked 'Log Cabin' style, by beginning with a center square, then working 'logs' around the center.
3. Each Square uses 5 colors, beginning at the center with A. One side of each Square is worked with light colors and the other side with dark colors.
4. Squares are sewn tog following a diagram; be sure to turn Squares in the direction shown on diagram to make the 'arrow' effect.
5. To change yarn color, work last st of old color to last yarn over. Yarn over with new color and draw through all loops to complete st. Fasten off old color and proceed with new color.
6. If desired, work over yarn ends as you go to save having to weave them all in at the end.
AFGHAN
Square 1
Center
With A, ch 11.
Row 1 (RS): Sc in 2nd ch from hook and in each ch across – you will have 10 sts at the end of Row 1.
Row 2: Ch 2 (counts as first hdc), turn, hdc in each st across – 10 sts.
Rows 3-7: Rep Row 2, changing to C at the end of Row 7.
First Log
Row 1 (RS): With C, ch 1, work 10 sc evenly spaced along side edge of Center Square – 10 sts.
Rows 2 and 3: Rep Row 2 of Center – 10 sts.
2nd Log
Row 1 (RS): With C, ch 1, work 4 sc evenly spaced along side edge of First Log, work 10 sc evenly spaced across lower edge of Center – 14 sts.
Rows 2 and 3: Rep Row 2 of Center, changing to I at the end of Row 3 – 14 sts.
3rd Log
Row 1 (RS): With I, ch 1, work 4 sc evenly spaced along side edge of 2nd Log, work 10 sc evenly spaced along side edge of Center – 14 sts.
Rows 2 and 3: Rep Row 2 of Center – 14 sts.
4th Log
Row 1 (RS): With I, ch 1, work 4 sc evenly spaced along side edge of 3rd Log, work 10 sc evenly spaced across top edge of Center Square, work 4 sc evenly spaced along side edge of 2nd log – 18 sts.
Rows 2 and 3: Rep Row 2 of Center, changing to F at the end of Row 3 – 18 sts.
5th Log
Row 1 (RS): With F, ch 1, work 4 sc evenly spaced across side edge of 4th Log, work 10 sts evenly spaced across top edge of First Log, work 4 sts evenly spaced along side edge of 2nd Log – 18 sts.
Rows 2 and 3: Rep Row 2 of Center – 18 sts.
6th Log
Row 1 (RS): With F, ch 1, work 4 sc evenly spaced across side edge of 5th Log, work 14 sts evenly spaced across top edge of 2nd Log, work 4 sts evenly spaced along side edge of 3rd Log – 22 sts.
Rows 2 and 3: Rep Row 2 of Center, changing to G at the end of Row 3 – 22 sts.
7th Log
Row 1 (RS): With G, ch 1, work 4 sc evenly spaced across side edge of 6th Log, work 14 sts evenly spaced across top edge of 3rd Log, work 4 sts evenly spaced along side edge of 4th Log – 22 sts.
Rows 2 and 3: Rep Row 2 of Center – 22 sts.
8th Log
Row 1 (RS): With G, ch 1, work 4 sc evenly spaced along side edge of 7th Log, work 18 sts evenly spaced across top edge of 4th Log, work 4 sts evenly spaced along side edge of 5th Log – 26 sts.
Rows 2 and 3: Rep Row 2 of Center, changing to C at the end of Row 3 – 26 sts.
9th Log
Row 1 (RS): With C, ch 1, work 4 sc evenly spaced along side edge of 8th Log, work 18 sts evenly spaced across top edge of 5th Log, work 4 sc evenly spaced along side edge of 6th Log – 26 sts.
Rows 2 and 3: Rep Row 2 of Center – 26 sts.
10th Log
Row 1 (RS): With C, ch 1, work 4 sc evenly spaced along side edge of 9th Log, work 22 sts evenly spaced across top edge of 6th Log, work 4 sc evenly spaced along side edge of 7th Log – 30 sts.
Rows 2 and 3: Rep Row 2 of Center, changing to I at the end of Row 3 – 30 sts.
11th Log
Row 1 (RS): With I, ch 1, work 4 sc evenly spaced along side edge of 10th Log, work 22 sts evenly spaced across top edge of 7th Log, work 4 sc evenly spaced along side edge of 8th Log – 30 sts.
Rows 2 and 3: Rep Row 2 of Center – 30 sts.
12th Log
Row 1 (RS): With I, ch 1, work 4 sc evenly spaced along side edge of 11th Log, work 26 sts evenly spaced across top edge of 8th Log, work 4 sc evenly spaced along side edge of 9th Log – 34 sts.
Rows 2 and 3: Rep Row 2 of Center – 34 sts.
Fasten off.
Square 2
Work Center with A, First and 2nd Logs with B, 3rd and 4th with J, 5th and 6th with E, 7th and 8th with G, 9th and 10th with B, 11th and 12th with J.
Square 3
Work Center with A, First and 2nd Logs with C, 3rd and 4th with K, 5th and 6th with F, 7th and 8th with H, 9th and 10th with C, 11th and 12th with K.
Square 4
Work Center with A, First and 2nd Logs with B, 3rd and 4th with H, 5th and 6th with F, 7th and 8th with I, 9th and 10th with B, 11th and 12th with H.
Square 5
Work Center with A, First and 2nd Logs with D, 3rd and 4th with K, 5th and 6th with B, 7th and 8th with G, 9th and 10th with D, 11th and 12th with K.
Squares 6 and 20
Work Center with A, First and 2nd Logs with E, 3rd and 4th with J, 5th and 6th with F, 7th and 8th with G, 9th and 10th with E, 11th and 12th with J.
Square 7
Work Center with A, First and 2nd Logs with C, 3rd and 4th with K, 5th and 6th with F, 7th and 8th with G, 9th and 10th with C, 11th and 12th with K.
Squares 8 and 17
Work Center with A, First and 2nd Logs with D, 3rd and 4th with I, 5th and 6th with B, 7th and 8th with H, 9th and 10th with D, 11th and 12th with I.
Square 9
Work Center with A, First and 2nd Logs with C, 3rd and 4th with H, 5th and 6th with D, 7th and 8th with J, 9th and 10th with C, 11th and 12th with H.
Square 10
Work Center with A, First and 2nd Logs with D, 3rd and 4th with K, 5th and 6th with E, 7th and 8th with H, 9th and 10th with D, 11th and 12th with K.
Square 11
Work Center with A, First and 2nd Logs with C, 3rd and 4th with H, 5th and 6th with E, 7th and 8th with J, 9th and 10th with C, 11th and 12th with H.
Square 12
Work Center with A, First and 2nd Logs with B, 3rd and 4th with I, 5th and 6th with F, 7th and 8th with G, 9th and 10th with B, 11th and 12th with I.
Square 13
Work Center with A, First and 2nd Logs with B, 3rd and 4th with J, 5th and 6th with E, 7th and 8th with H, 9th and 10th with B, 11th and 12th with J.
Square 14
Work Center with A, First and 2nd Logs with B, 3rd and 4th with H, 5th and 6th with D, 7th and 8th with K, 9th and 10th with B, 11th and 12th with H.
Square 15
Work Center with A, First and 2nd Logs with D, 3rd and 4th with I, 5th and 6th with B, 7th and 8th with G, 9th and 10th with D, 11th and 12th with I.
Square 16
Work Center with A, First and 2nd Logs with B, 3rd and 4th with G, 5th and 6th with E, 7th and 8th with J, 9th and 10th with B, 11th and 12th with G.
Square 18
Work Center with A, First and 2nd Logs with D, 3rd and 4th with H, 5th and 6th with C, 7th and 8th with K, 9th and 10th with D, 11th and 12th with H.
Square 19
Work Center with A, First and 2nd Logs with C, 3rd and 4th with H, 5th and 6th with D, 7th and 8th with I, 9th and 10th with C, 11th and 12th with H.
Square 21
Work Center with A, First and 2nd Logs with D, 3rd and 4th with G, 5th and 6th with B, 7th and 8th with K, 9th and 10th with D, 11th and 12th with G.
Square 22
Work Center with A, First and 2nd Logs with C, 3rd and 4th with I, 5th and 6th with D, 7th and 8th with G, 9th and 10th with C, 11th and 12th with I.
Square 23
Work Center with A, First and 2nd Logs with B, 3rd and 4th with G, 5th and 6th with D, 7th and 8th with K, 9th and 10th with B, 11th and 12th with G.
Square 24
Work Center with A, First and 2nd Logs with C, 3rd and 4th with J, 5th and 6th with E, 7th and 8th with H, 9th and 10th with C, 11th and 12th with J.
FINISHING
Following diagram, sew Squares into 4 strips of 6 Squares each. Sew strips tog to make Afghan.
Border: From RS, join A with a sl st in any st along outside edge of Afghan.
Rnd 1: Ch 1, work sc evenly spaced around entire outside edge of Afghan, working 3 sc in each corner; join with sl st in first sc.
Rnd 2 (WS): Ch 1, turn, working through front loops only, sl st in each st around; join with sl st in first st.
Fasten off.
Weave in ends.
Read NextWorld's Easiest Afghan
Your Recently Viewed Projects
Thanks for your comment. Don't forget to share!
Delphine Bryant
Sep 25, 2018
Can you say colorful boys and girls? I love this. This is a piece of art all by itself. My preference would be to have it on the bed at all times to enjoy all of the colors in the afghan. However, Kitty may not allow it. He has a tendency to "scratch" the bed linen and I would not be happy if he damaged this.
Morehouse17
Aug 30, 2018
Until I read the directions for this I thought it was worked in continuous lengths. I am amazed that this is done in twenty four motifs and joined. This log cabin arrow crochet project just shot up to the top of my to make list.
JaneEK
Jun 11, 2018
I cant remember how old I was when I encountered my first handmade quilt. I do remember wielding scissors for what seemed like days for a Postage Stamp quilt, and snuggling under my paternal grandmas Sunbonnet Sue. But the geometry and contrasts of the Log Cabin quickly made it my favorite. Im so happy to see this in crochet form. Its the best of both worldsafghan and quilt.
Daughter of Light
Oct 29, 2017
Wow! This is like combining two crafts into one...quilting and crocheting! I love this pattern either way. It does look intimidating but once you start reading the pattern not so much. The only thing I might change would be the denali (pink) color. I think it seems to stand out too much. I think I might substitute badlands instead. Thanks for the beautiful pattern!
Lynn K
May 11, 2017
Oh my word, this Log Cabin Arrow Afghan is particularly beautiful! The colors are spectacular and, if you do not like the arrow design, there are umpteen different ways to put the squares together, it all depends on your imagination and preferences. I love that it is such an Easy pattern even though it looks super complicated. Anyone seeing the completed afghan would be extremely impressed.
Zeemer
Jul 08, 2016
Very appopriate for a log cabin and camping events. Gives me images of bonfire and mountains and trees. It helps that the pattern is found right on the front page.
Zeemer
Jun 06, 2016
Wow. The name is very appropriate for the look of this afghan. I imagine cool nights in a camping site near the mountain. Wow, thanks for the one who prepared the pattern, kind enough to place it right on the same page. Thank you.
alaird59 3197729
Apr 11, 2015
I just finished this log cabin afghan and love it! I was careful to match the gauge and do have to say that I ran out of some colors on about square 17, so I did a chart of all the stitches for each color and planned out squares 18 - 24 a bit differently. I then rearranged a few squares based on my own preference when I was finished with all of them. It is very striking!
arnts1ta
May 13, 2016
Was it really difficult? I've been crocheting for several years but just looking at the picture slightly scares me away from even attempting the pattern! Do you make up all the squares separately and then attach them together at the end? Any tips for those of us who might try this pattern in the future?
Report Inappropriate Comment
Are you sure you would like to report this comment? It will be flagged for our moderators to take action.
Thank you for taking the time to improve the content on our site.