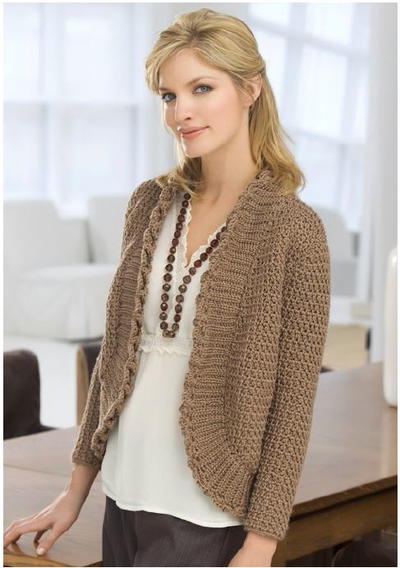
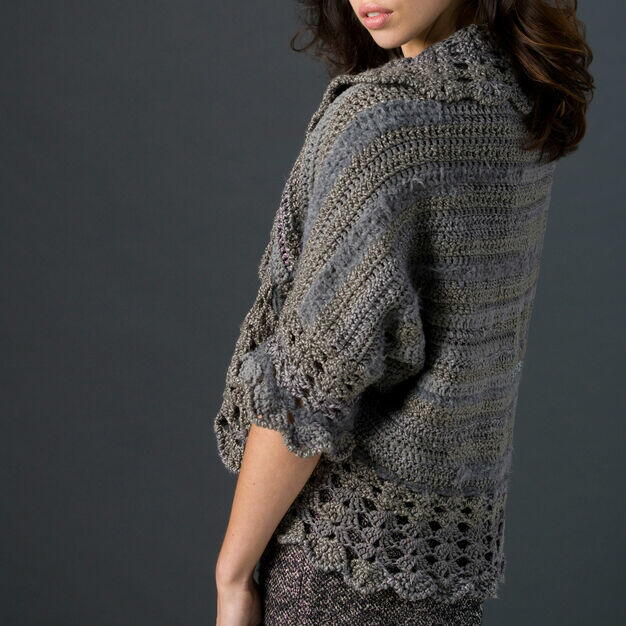
Granite Open Cardigan

Using Red Heart Boutique Changes yarn in the Granite colorway, you can make this easy open cardigan crochet pattern. Granite is the perfect fall color to use for a cardigan like this one. Neutral tones like gray are perfect for building a versatile crochet wardrobe you’ll treasure. With the open front you can wear bulky tops underneath to keep warm, or a lighter top on warmer days. This easy crochet cardigan pattern features fan stitch accents to add some extra flair to this stylish design.

Crochet HookH/8 or 5 mm hook
Yarn Weight(5) Bulky/Chunky (12-15 stitches for 4 inches)
Crochet GaugeGAUGE: 27 sts = 8”; 8 rows = 4” in dc. CHECK YOUR GAUGE. Use any size hook to obtain the gauge.
Finished SizeTo Fit Bust: 32-34 (36-38, 40-42)”. Width of Body before sleeves and edging: 32 (36, 40)”
Materials List
- RED HEART® Boutique™ “Changes™”: 6 (7, 9) balls 9403 Granite.
- Crochet Hook: 5mm [US H-8].
- Yarn needle
Cardigan
CLICK HERE FOR THE PATTERN PDF
Directions are for sizes Small; changes for sizes Medium and Large are in parentheses.
ABBREVIATIONS:
- Ch = chain
- Dc = double crochet
- Mm = millimeters
- Sc = single crochet
- St(s) = stitch(es)
- Tr = treble crochet
- * = repeat whatever follows the * as indicated.
Body
-
Ch 109 (123, 137)
-
Row 1 (Right Side): Dc in 4th ch from hook, dc in next ch and in each ch across; turn – 107 (121, 135) sts.
-
Row 2: Ch 3, skip first dc, dc in next dc and in each dc across, dc in top of ch-3; turn.
Repeat Row 2 until 20 (22, 24)” from beginning. Fasten off.
Side Edgings
With right side facing, join yarn in right-hand edge of Row 1; ch 1, work 64 (68, 75) sc across row ends. Fasten off.
Repeat Edging on left edge.
Side Seams
Fold Body in half with right sides together so that piece is now 10 (11, 12)” high x 32 (36, 40)” wide.
Sew side seams from bottom corners toward fold line through 12 (14, 15) sc of both thicknesses leaving 40 (40, 45) sc free for each sleeve opening.
Sleeves
-
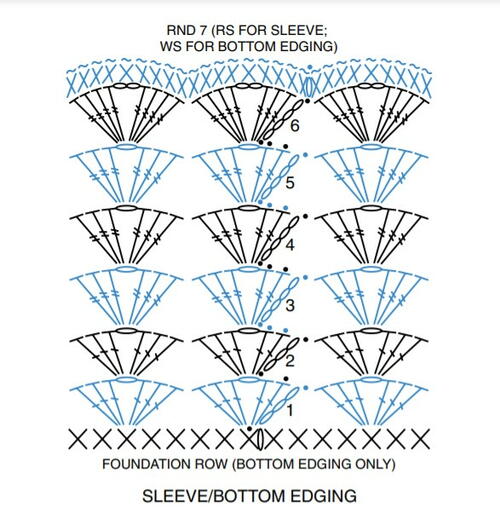
Round 1: With right side facing, join yarn in first sc after side seam; ch 3, (2 dc, ch 1, 3 dc) in same sc, skip next 4 sc, * (3 dc, ch 1, 3 dc) in next sc, skip next 4 sc; repeat from * around; join with a slip st in top of ch-3 – 8 (8, 9) shells.
-
Round 2: Slip st in next 2 dc and ch-1 space, ch 3, (2 dc, ch 1, 3 dc) in same space, * (3 dc, ch 1, 3 dc) in next ch-1 space; repeat from * around; join.
-
Rounds 3-5: Slip st in next 2 sts and ch-1 space, ch 4, (2 tr, ch 1, 3 tr) in same space, * (3 tr, ch 1, 3 tr) in next space; repeat from * around; join in top of ch-4.
-
Round 6: Slip st in next 2 tr and in ch-1 space; ch 4, (3 tr, ch 1, 4 tr) in same space, * (4 tr, ch 1, 4 tr) in next space; repeat from * around; join.
-
Round 7: Ch 1, work Reverse sc in each st and space around; join with slip st in first sc. Fasten off.
Repeat Rounds 1-7 on other sleeve opening.
Body Edging
-
Foundation Round: With right side facing, join yarn in first st after a side seam; ch 1, loosely sc in each st and seam around body dec (inc, inc) 1 (1, 3) sc; join in first sc – 215 (245, 275) sc.
-
Round 1: Ch 3, (2 dc, ch 1, 3 dc) in same sc, skip next 4 sc, * (3 dc, ch 1, 3 dc) in next sc, skip next 4 sc; repeat from * around; join in top of ch-3 – 43 (49, 55) shells.
-
Round 2: Slip st in next 2 dc and ch-1 space, ch 3, (2 dc, ch 1, 3 dc) in same space, * (3 dc, ch 1, 3 dc) in next space; repeat from * around; join.
-
Rounds 3-5: Slip st in next 2 sts and ch-1 space, ch 4, (2 tr, ch 1, 3 tr) in same space, * (3 tr, ch 1, 3 tr) in next space; repeat from * around; join in top of ch-4.
-
Round 6: Slip st in next 2 tr and ch-1 space, ch 4, (3 tr, ch 1, 4 tr) in same space, * (4 tr, ch 1, 4 tr) in next space; repeat from * around; join.
-
Round 7: Ch 1, TURN, work Reverse sc in each st and space around; join. Fasten off. Weave in ends.
Up Next
Read NextOver Sized Olive Jacket
Your Recently Viewed Projects

Thanks for your comment. Don't forget to share!
Linda
Feb 16, 2017
Crocheted one piece patterns are so elegant omitting seams for a slinky flowing finish. This open lace cardigan is great for learning to crochet my own designs.
fefie
Apr 04, 2016
this looks very nice but without a schematic I don't even start any project. This is really ridiculous !
EllenJB
Apr 06, 2015
You need pictures for each step. I had no idea what you meant with some of the instructions.
HAPPYCAT
Dec 11, 2014
Hello all - I entered the brand of the yarn (Red Heart) which took me to Herrschners. Then I entered the specific yarn used in the pattern. (Boutique Changes). It came up and in the description - it gives all the details for that yarn, including how much is in a skein or ball etc. Here is a link for this one - http//www.herrschners.com/Product/BoutiqueChanges. == aspx This method of searching has served me well in most cases. -)
alicedeniz 9076967
Nov 03, 2014
A ball of yarn does not seem to be an exact specific amount. How many ounces are needed for the open cardigan.
alicedeniz 9076967
Nov 03, 2014
I want to make this cardigan but have a starting question. How many ounces in a "ball" of yarn? I'm not on face book to get the answer from there.
Snomofam
Apr 08, 2014
I am confused about the body edging the dec (inc,inc). Can someone help me.
JennyBee1
Apr 09, 2014
Hi, Thanks for your message. I might suggest that you try posting your question to our sites Facebook page. It is monitored by the editor and is a great resource for helpful tips and suggestions from our Facebook friends; perhaps they can offer some guidance! Here is the link: http://www.facebook.com/AllFreeCrochet -editors of AllFreeCrochet
Karie B
Apr 08, 2014
I made this for my sister for Christmas in a dark slate blue yarn. It turned out beautiful. The pattern was easy to read and follow.
pjn1penny 5861572
Apr 09, 2013
I jumped right into this project. Now that I have the body completed, I am very confused about the instructions for the side seams. I can not envision how this is going to work. Has anyone else made this sweater yet? Any input would be greatly appreciated.
Report Inappropriate Comment
Are you sure you would like to report this comment? It will be flagged for our moderators to take action.
Thank you for taking the time to improve the content on our site.