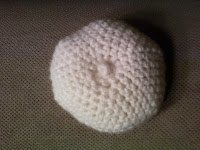
Mr. Fluffs Crocheted Kitty

Both kids and adults will love playing with this Mr. Fluffs Crocheted Kitty! He measures approximately 9.25 inches tall. The shiny bow completes his dashing outfit. Use black yarn and an orange bow for a spooky Halloween decoration.

Crochet HookG/6 or 4 mm hook
Yarn Weight(4) Medium Weight/Worsted Weight and Aran (16-20 stitches to 4 inches)
MEASUREMENTS: Approximately 9¼ " [23.5 cm] tall.
MATERIALS:
-
Sheep(ish) by Vickie Howell (85 g/ 3 oz, 153 m/167 yds)
00014 Coral(ish) 1 ball - Size US G/6 (4 mm) crochet hook, or size to obtain gauge
- Stitch markers
- Stuffing
- Handful of dried beans (to weight bottom of cat)
- Silk or velvet ribbon (optional – for bow at neck)
- One pair cat safety eyes—12 mm diameter
- Small pieces of white felt (for eyes)
- Small piece of grey felt (for nose)
- Sewing thread and needle
- Brown eye shadow (optional – for shading inside of ears)
- Grey embroidery thread (optional – for eyelashes)
- Large eye blunt tip needle
GAUGE: 216 sc x 19 r = 4"/10 cm.
ABBREVIATIONS
Ch(s) = Chain(s).
Sc = Single crochet.
Sc2tog = Single crochet 2 together—Insert hook in next stitch, yarn over and draw up a loop, (2 loops on hook), insert hook in next stitch, yarn over and draw up a loop, yarn over and draw through all 3 loops on hook.
Sl st = Slip stitch.
INSTRUCTIONS
BODY
Beginning at bottom of body, ch 16.
Round 1: Sc in 2nd ch from hook and in each remaining ch across to last ch, 3 sc in last ch, place marker in center sc of 3-sc group just made; working across opposite side of foundation ch, sc in next ch and each remaining ch across to last ch (ch at base of first sc), 2 sc in last ch, place marker in last sc made; join with sl st in first sc—32 sc. Move markers up as work continues.
Rounds 2–5: Ch 1, [sc in each sc across to marker, 3 sc in marked sc] 2 times, sc in each sc to end of round; join with sl st in first sc—48 sc. Remove markers
Rounds 6–19: Ch 1, sc in each sc around; join with sl st in first sc. Do not fasten off.
Shape Body
Flatten piece to find side edges, place a marker in each side edge ensuring that there are the same number of stitches between the markers on front and back. Move markers up as work progresses.
Rounds 20–26: Ch 1, *sc in each sc to 1 st before marker, sc2tog; repeat from * once more, sc in each sc to end of round; join with sl st in first sc—34 sts.
Neck
Rounds 27–31: Ch 1, sc in each sc around; join with sl st in first sc. Fasten off, leaving a long tail for sewing. Place a handful of beans in lower portion of body, then stuff body firmly.
HEAD
Beginning at top of head, ch 4, join with sl st in first ch to form a ring.
Round 1: Work 6 sc in ring; join with sl st in first sc—6 sc.
Round 2: Ch 1, 2 sc in each sc around; join with sl st in first sc—12 sc.
Round 3: Ch 1, [sc in next sc, 2 sc in next sc] 6 times; join with sl st in first sc—18 sc.
Round 4: Ch 1, [sc in next 2 sc, 2 sc in next sc] 6 times; join with sl st in first sc—24 sc.
Round 5: Ch 1, [sc in next 3 sc, 2 sc in next sc] 6 times; join with sl st in first sc—30 sc.
Round 6: Ch 1, [sc in next 4 sc, 2 sc in next sc] 6 times; join with sl st in first sc—36 sc.
Round 7: Ch 1, [sc in next 5 sc, 2 sc in next sc] 6 times; join with sl st in first sc—42 sc.
Rounds 8–10: Ch 1, sc in each sc around; join with sl st in first sc.
Round 11: Ch 1, [sc in next 5 sc, sc2tog] 6 times; join with sl st in first sc—36 sts.
Round 12: Ch 1, [sc in next 4 sc, sc2tog] 6 times; join with sl st in first sc—30 sts.
Round 13: Ch 1, [sc in next 3 sc, sc2tog] 6 times; join with sl st in first sc—24 sts.
Round 14: Ch 1, [sc in next 2 sc, sc2tog] 6 times; join with sl st in first sc—18 sts.
Round 15: Ch 1, [sc in next sc, sc2tog] 6 times; join with sl st in first sc—12 sts.
Round 16: Ch 1, [sc2tog] 6 times; join with sl st in first sc—6 sts.
Fasten off, leaving a long tail for sewing. Stuff head firmly.
Note: The small opening at the bottom of the head will be covered when the head is sewn to the body.
EARS (make 2)
Beginning at bottom of each, ch 16; join with sl st in first ch to form a ring.
Round 1: Ch 1, sc in each ch around; join with sl st in first sc—16 sc.
Round 2: Ch 1, sc in each sc around; join with sl st in first sc.
Round 3: Ch 1, [sc2tog, sc in next sc] 5 times, sc in last sc; join with sl st in first sc—11 sts.
Round 4: Ch 1, sc in each sc around; join with sl st in first sc.
Round 5: Ch 1, [sc2tog, sc in next sc] 3 times, sc in last 2 sc; join with sl st in first sc—8 sc.
Round 6: Ch 1, sc in each sc around; join with sl st in first sc.
Round 7: Ch 1, [sc2tog] 4 times; join with sl st in first sc—4 sc.
Fasten off, leaving a long tail. Thread tail through stitches of last round and pull tight to close opening. Do not stuff ears.
TAIL
Beginning at base of tail, ch 12; join with sl st in first ch to form a ring.
Round 1: Ch 1, sc in each ch around; join with sl st in first sc—12 sc.
Rounds 2–13: Ch 1, sc in each sc around; join with sl st in first sc.
Shape Tail
Tail shaping is worked back and forth in rows. Turn piece to work back in opposite direction.
Row 1: Ch 1, sc in next 5 sc, turn to work in original direction.
Continue Tail
Next Round: Ch 1, sc in each sc of Row 1, continuing in same direction, sc in each sc all the way around; join with sl st in first sc—12 sc.
Rounds 15 and 16: Ch 1, sc in each sc around; join with sl st in first sc.
Rounds 17 and 18: Ch 1, [sc2tog] 6 times; join with sl st in first sc—6 sc. Fasten off, leaving along tail. Thread tail through stitches of last round and pull to close opening. Stuff tail.
FINISHING
Eyes: Cut two almond shaped pieces of white felt for eyes. Make small slits in felt. Insert post of one safety eye through slit in one piece of felt then into head. Secure safety eye with washer. Hand sew felt piece to head. Repeat for other eye and felt piece. With grey embroidery floss, and using photo as a guide, embroider straight stitch eyelashes at corners of eyes (optional).
Nose: Cut triangular piece of grey felt, round the corners of the triangle. Sew to face.
Assemble: Flatten ears and sew to head. Brush a little brown eye shadow onto inside of each ear (optional). Sew head to body. Sew tail to body. Using yarn needle, weave in all ends. Tie a silk or velvet bow around Mr. Fluff's neck (optional).
Your Recently Viewed Projects
Thanks for your comment. Don't forget to share!
JaneEK
Jul 29, 2017
Its really aggravating to come across an interesting looking project and there are no photos of either the project or the process. I went to the Bernat link provided by JMitchell, but this just leads to the main Bernat site, not to the link for Mr. Fluffs itself. There are too many hoops to try to jump through to search for this project, so Im bailing on this one.
AFC Editor Julia
Jul 31, 2017
Hi Jane, We recently migrated our project pages to a new template, so some photos aren't displaying properly. We're working to fix them, so please bear with us! :) Thank you, Julia, editor for AllFreeCrochet
JMitchell
Aug 22, 2012
The link above that says "click here for pattern" is inaccurate. However, those looking for a printable version of Mr. Fluff's Crocheted Kitty can find a pdf here: http://www.bernat.com/pattern.php?PID=6631
JMitchell
Aug 22, 2012
Oops. I forgot to mention that you do need to create a free login to the Bernat website before they allow you to download their patterns...
Report Inappropriate Comment
Are you sure you would like to report this comment? It will be flagged for our moderators to take action.
Thank you for taking the time to improve the content on our site.