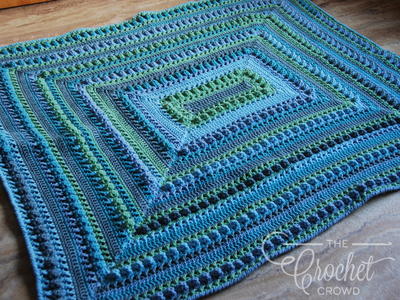
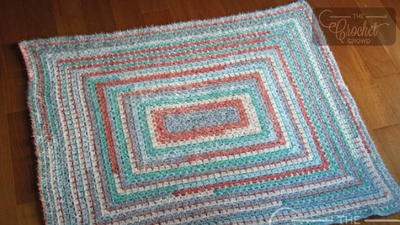
Round Stained Glass Afghan
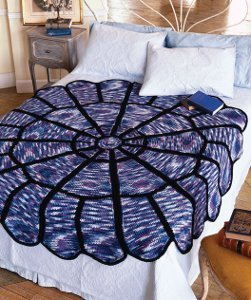
This Round Stained Glass Afghan is an easy crochet afghan to make and will look great draped over your bed. The stunning pattern truly resembles a stained glass window, just like one you would see at church. If you've never made a round crochet afghan before, this is a great pattern to start with. Red Heart Super Saver yarn is used to work up this free crochet afghan pattern. It measures approximately 76 inches in diameter when complete.

Crochet HookI/9 or 5.5 mm hook
Yarn Weight(4) Medium Weight/Worsted Weight and Aran (16-20 stitches to 4 inches)
MATERIALS:
- Red Heart® “Super Saver®”: 13 skeins 0940 Plum Pudding A and 3 skeins 0312 Black B
- Crochet Hook: I-9 (5.5mm)
- Yarn needle
- Stitch markers
- Chart
SIZE:
Approx 76”/193cm diameter.
GAUGE:
13 sc + 15 rows = 4”/10cm. CHECK YOUR GAUGE. Use any size hook to obtain the specified gauge.
Notes:
To change color, work last st of old color to last yo, yo with new color and draw through both lps on hook to complete st. Use a separate ball of yarn or bobbins for each section that requires a color change.
Special Abbreviations
sc2tog (sc 2 sts together): [Insert hook in next st, yo and draw up a lp] twice, yo and draw through all 3 lps on hook.
AFGHAN
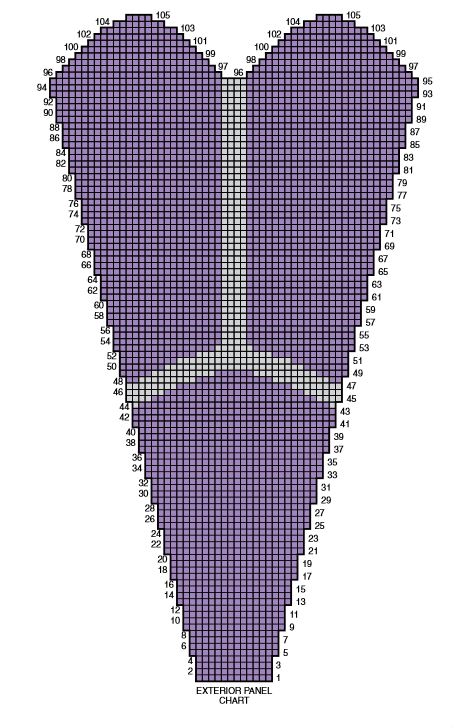
Exterior Panel (make 11)
Starting at center edge with A, ch 13.
Row 1 (right side): Sc in 2nd ch from hook and in each rem ch across – 12 sc. Ch 1, turn.
Rows 2–4: Sc in each st across. Ch 1, turn.
Row 5: Work 2 sc in first st, sc in each st across to last st, 2 sc in last st – 14 sc. Ch 1, turn.
Rows 6–95: Following Exterior Panel Chart for color placement, repeat Rows 2–5 twenty-two times more, then repeat Rows 2 and 3 once more – 58 sc at end of Rows 93–95. Place marker in first and last st on Row 95. Fasten off B. Do not fasten off A.
First Scallop
Row 96 (wrong side): Sc2tog, sc in next 25 sts – 26 sc. Ch 1, turn, leaving rem sts unworked.
Row 97: Sc2tog, sc in each st across to last 2 sts, sc2tog – 24 sc. Ch 1, turn.
Rows 98–103: Repeat Row 2 six times more – 12 sc at end of row 103. At end of Row 103, do not ch 1.
Row 104: Sl st in first st, ch 1, sc2tog, sc in each st across to last 3 sts, sc2tog – 8 sc. Ch 1, turn, leaving last st unworked.
Row 105: Repeat Row 104 – 4 sc. At end of row, do not ch 1.
Fasten off.
Second Scallop
Row 96 (wrong side): With wrong side facing, sk next 4 unworked sts on Row 95, join A with sl st in next st, ch 1, sc in same st as joining, sc in each rem st across to last 2 sts; sc2tog – 26 sc. Ch 1, turn.
Rows 97–105: Work same as Rows 97–105 on First Scallop.
Exterior Panel Edging
Note: When working sts with B on Round 1, carry A along edge of panel and work B sts over strand of A, changing back to A in last st of B. Drop and cut B after short section of B has been worked.
Round 1: With right side facing and Row 1 at top, join A with sc in free lp of ch at right-hand corner of center edge of any exterior panel, matching yarn color with center of exterior panel and changing color as necessary, sc in free lp of each foundation ch along center edge, in edge of each row along both side edges and in each st on scallop edge around panel, working 2 sc in each corner of center edge and in each marked corner st on Row 95; join with sl st in first sc. Fasten off
Round 2: With right side facing, join B with sl st in first sc, ch 1, sc in same st as joining, sc in each sc around, working 2 sc in each corner; join as before.
Round 3: Ch 1, sc in same st as joining, sc in each sc around, working 2 sc in each corner; join. Fasten off.
Interior Panel (make 11)
Starting at center edge with A, ch 5.
Row 1 (right side): Sc in 2nd ch from hook and in each rem ch across – 4 sc. Ch 1, turn.
Rows 2–4: Sc in each st across. Ch 1, turn.
Row 5: Work 2 sc in first st, sc in each st across to last st, 2 sc in last st – 6 sc. Ch 1, turn.
Rows 6–14: Repeat Rows 2–5 two times more, then repeat Row 2 once more – 10 sc at end of Rows 13 and 14.
Interior Panel Edging
Round 1 (right side): Sc in each st and in edge of each row around panel, working 2 sc in each corner; join with sl st in first sc. Fasten off.
Rounds 2 and 3: Work same as Rounds 2 and 3 on exterior panel edging.

For more afghans like this one, check out: 22 Quick and Easy Crochet Afghans + Bonus Video
ASSEMBLY
Place two exterior panels with right sides tog. Working through both thicknesses, join B with sl st in back lp of first st at end of long panel edges, sl st in back lp of each st across long panel edge. Fasten off. Repeat on other exterior panels until all panels have been assembled, forming a large exterior ring. Assemble interior panels in same manner as exterior panels, forming an interior ring. Connect exterior and interior rings by placing each face down on a large surface with interior ring in center opening of exterior ring. Working through both thicknesses, join B with sl st in back lp of any st on outer edge of interior ring and inner edge of exterior ring, sl st in back lp of each st around until inner and outer rings are joined, easing to fit where necessary. Join with sl st in first sl st. Turn afghan over.
Inner Circle
Round 1: With right side facing, join B with sl st in bottom right- hand corner of any interior panel edge, ch 1, sc in same st as joining and in next 5 sc along bottom edge of panel; work 6 sc along bottom edge of each panel around – 66 sc. Join with sl st in first sc. Fasten off.
Round 2: With right side facing, join A with sl st in first sc, ch 1, starting in same st as joining, [sc in next 4 sc, sc2tog] 11 times – 55 sc. Join as before.
Round 3: Ch 1, sc in same st as joining and in each sc around. Join.
Round 4: Ch 1, starting in same st as joining, [sc in next 3 sc, sc2tog] 11 times – 44 sc. Join.
Round 5: Repeat Round 3.
Round 6: Ch 1, starting in same st as joining, [sc in next 2 sc,
sc2tog] 11 times – 33 sc. Join.
Round 7: Ch 1, starting in same st as joining, [sc in next sc, sc2tog] 11 times – 22 sc. Join
Round 8: Ch 1, starting in same st as joining, [sc2tog] 11 times – 11 sc. Join.
Round 9: Ch 1, starting in same st as joining, [sc2tog] 5 times; sc in next sc – 6 sc. Join. Fasten off, leaving a long tail. Weave tail through sts to close hole.
FINISHING
Weave in all ends.
Abbreviations: ch(s) = chain(s); lp(s) = loop(s); rem = remain(ing); sc = single crochet; sl st = slip stitch; st(s) = stitch(es); tog = together; yo= yarn over; [ ] = Work directions inside brackets as many times as indicated.
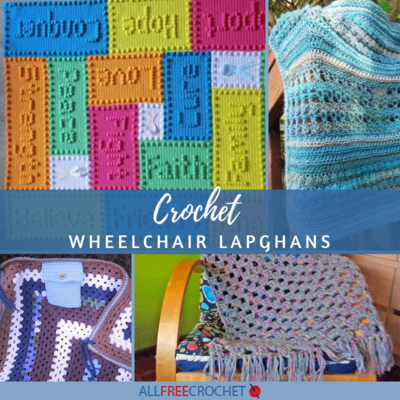
Read Next12 Crochet Wheelchair Lapghans
Your Recently Viewed Projects
Thanks for your comment. Don't forget to share!
Delphine Bryant
May 30, 2018
The first time I saw a circular crochet pattern I was in awe. They are just so cool. I made a couple as baby blankets and the moms loved them dearly. This one here is really fancy and I like the stain glass affect. This would be a keeper for sure and not one I would want to give away.
Morehouse17
May 29, 2018
As many times as I have seen the circular crochet patterns, I have yet to make one. I stumbled upon this one and the designer used "my colors" so this must be the one that I am destined to make. It has been a while since I have been excited about starting a new project. So it is off to the craft store to purchase the necessary materials. Thanks for the free pattern .
elocin1104 2800379
Aug 05, 2017
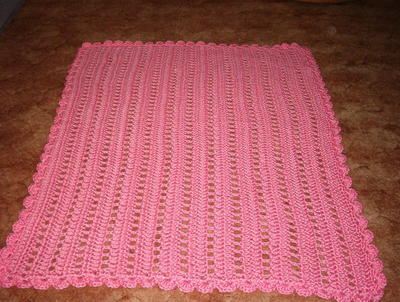
I love the look of this pattern! I have never seen anything like it, which is somewhat surprising considering all the patterns I have seen lately. I love how it really looks like a stain glass window. I am wondering how this would look in a different variegated yarn, such as pinks or yellows. I am sure it would be amazing! I can't wait to get started on this pattern, when I'm done with all the other projects I have on my list currently.
Lynn K
May 06, 2017
Absolutely stunning! Please do not be discouraged by the fact that it looks complicated. It really is very easy .Sadly my PC does not want to allow me to upload photos on to this site but I have just completed this project and it is really gorgeousl! Just begin and follow the pattern. If you read the whole thing at once it seems daunting but if you do it bit by bit it works out beautifully. Promise!
K and A
Jan 20, 2017
This pattern (final product) looks amazing! Its motivating to see that others have made this, but I imagine this would take me quite a while to finish. Its considered an easy pattern, but skimming through the pattern makes it seem quite complicated, especially with the chart (it reminds me of filet crochet). I think if I were to attempt to make this pattern, it would be easier to go through.
dewittamy 2167770
Oct 03, 2016
I made this for my brother and his new wife a few years back for a wedding gift. It was beautiful, heavy and very large. Made one for myself as well. This is a go to on those cold winter nights!! Love the pattern.
lgthse63
Apr 17, 2017
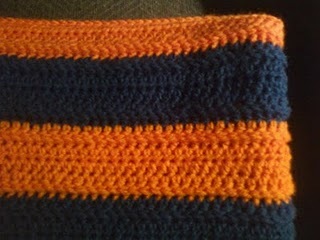
I am making right now but having trouble carrying over the black for the mid-panel stripe. Did your back not look good? Do you have a picture of your afghans back so I know if I am on the right track or any suggestions? Thanks riverlife03@gmail.com
lilliangourd 13801 73
Feb 20, 2014
I have been trying to print the pattern for the round stained-glass afghan but to no avail. I have tried everything I know. Please help. Also, I do not understand what I am supposed to do with the "avatar"? lilliangourd
mlspencer3688 2911 893
Oct 03, 2016
I do a copy/paste to a word document of the entire instruction and save to a thumb drive. That way I can print it out.
hellofromjackie 45 87591
Aug 18, 2013
this is a beautiful pattern and I hope to make it one day. I agree with the ladies who have already commented.. the pictures are small. In my needlework group there is a blind lady who crochets along with us. Her daughter gets her started and she just sets about crocheting her project. It's interesting to watch her. Hope my eyes will hold out while I still enjoy crocheting.
hynsite1 3996650
Aug 18, 2013
If you hold down ctrl and click on + the image will get larger and then hold down ctrl and click on _ the image will get smaller.
Krynne
Aug 26, 2012
I too wish that many of the images on this site were bigger. I have severe loss of vision and usually need a magnifier during my crocheting, so for my legally blind eyes these images are mere blobs.
Report Inappropriate Comment
Are you sure you would like to report this comment? It will be flagged for our moderators to take action.
Thank you for taking the time to improve the content on our site.