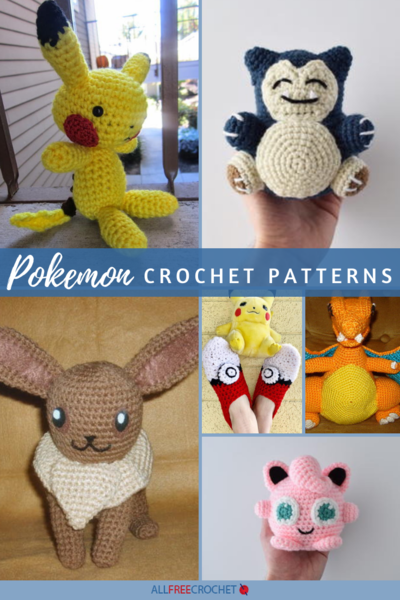
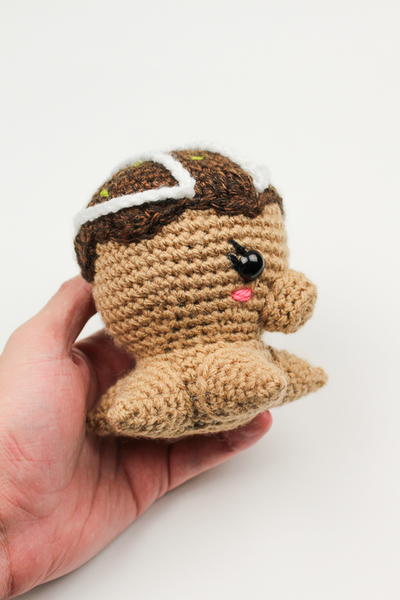
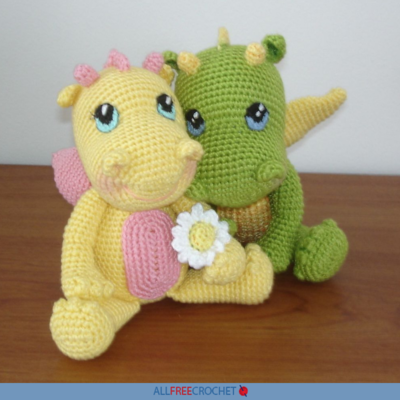
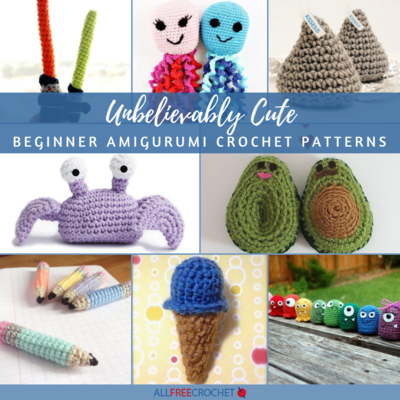
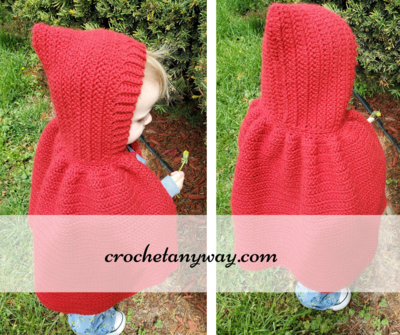
Mystery Crochet Along: Week 2
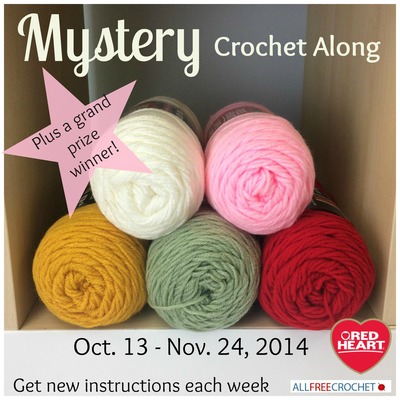
 Welcome to AllFreeCrochet's FIRST Mystery Crochet Along! If you're just joining us and would like some more information or you missed out on the materials list, then learn all about our exciting adventure ahead of us. We're on week two where we'll be creating the main structure of the crochet pattern. I'm telling you, you might be clueless at first about what we're making but it's just so cute! Feel free to take some guesses if you'd like.
Gauge:
18 sts = 4”; 20 rows = 4” in single crochet with smaller hook. Use any size hook to obtain the gauge
Special Technique:
Adjustable ring: Holding the yarn a few inches from the end, wrap around your finger. Do not remove wrap from finger, insert hook into the wrap and draw up a loop of
working yarn. Chain one to secure the loop, and remove ring from finger. Work stitches of first round in the ring. Pull gently, but firmly, on tail to tighten ring.
Special Stitches:
hdc2tog = [Yarn over, draw up a loop in next st] twice, yarn over and draw through all 5 loops on hook.
sc2tog = [Draw up a loop in next st] twice, yarn over and draw through all 3 loops on hook.
Notes:
1. Gauge is not critical for this project. Work tightly so stuffing will not show between stitches.
2. Pieces are worked separately then sewn together.
3. Most pieces are worked in continuous rounds, do not join at ends of rounds unless instructed.
4. Week 2 instructions are worked in one piece.
5. Week 3 instructions are worked in 2-row stripes. To change color, work last stitch of old color to last yarn over. Yarn over with new color and draw through all loops on hook to complete
stitch. Proceed with new color. Carry color not in use up side of piece. Take care to cover carried strands when working edging.
Pattern Instructions:

Beginning at top of head, with smaller hook and A, make an adjustable ring.
Round 1: Work 6 sc in ring—6 sc. Do not join, work in continuous rounds (spirals). Place a marker for beginning of round. Move marker up as each round is completed.
Round 2: Work 2 sc in each sc around—12 sc.
Round 3: [2 sc in next sc, sc in next sc] 6 times—18 sc.
Round 4: [2 sc in next sc, sc in next 2 sc] 6 times—24 sc.
Round 5: [2 sc in next sc, sc in next 3 sc] 6 times—30 sc.
Round 6: [2 sc in next sc, sc in next 4 sc] 6 times—36 sc.
Round 7: [2 sc in next sc, sc in next 5 sc] 6 times—42 sc.
Round 8: [2 sc in next sc, sc in next 6 sc] 6 times—48 sc.
Rounds 9–20: Sc in each sc around.
Round 21: [Sc in next 6 sc, sc2tog] 6 times—42 sts.
Round 22: [Sc in next 5 sts, sc2tog] 6 times—36 sts
Round 23: [Sc in next 4 sts, sc2tog] 6 times—30 sts.
Round 24: [Sc in next 3 sts, sc2tog] 6 times—24 sts.
Round 25: Sc in each sc around.
Attach safety eyes between Rounds 16 and 17.
Rounds 26–28: Repeat Rounds 5–7—42 sc.
Rounds 29–31: Sc in each sc around.
Round 32: Repeat Round 8—48 sc.
Round 33: Sc in each sc around.
Round 34: [2 sc in next sc, sc in next 7 sc] 6 times—54 sc.
Round 35: Sc in each sc around.
Round 36: [2 sc in next sc, sc in next 8 sc] 6 times—60 sc.
Rounds 37–57: Sc in each sc around.
Begin stuffing piece, and continue to stuff until piece is complete.
Round 58: [Sc in next 8 sc, sc2tog] 6 times—54 sts.
Round 59: [Sc in next 7 sts, sc2tog] 6 times—48 sts.
Rounds 60–63: Repeat Rounds 21–24—24 sts.
Round 64: [Sc in next 2 sts, sc2tog] 6 times—18 sts.
Round 65: [Sc in next st, sc2tog] 6 times—12 sts.
Fasten off, leaving a long tail. Thread tail through stitches of last round. Pull to close opening. Securely weave in end.
Be sure you share your work in progress photos below by clicking on the blue "add your link" button!
Your Recently Viewed Projects
Thanks for your comment. Don't forget to share!
brobeelover 767921 2
Nov 06, 2014
ok I didnt concern myself with gauge because I figured its for fun and who cares I'll throw caution to the wind...This this is ginormous now and Im not sure how I feel about it
rameysgrandma
Oct 28, 2014
Thank you chriskepner, I finally found the instructions for week 3.
chriskepner
Oct 28, 2014
I finally found week 3 instructions under what's hot at the bottom left of the page.
dlfrueh 4785360
Oct 26, 2014
Finally got my picture posted. Used my laptop instead of my IPad. I used two different colors of buttons for the eyes black over white. Less chance that they will fall off. Plan to give this to my Grandson. Onto step 3!
wytweety 7567269
Oct 26, 2014
If you refer to the materials list, it identifies the colors by alphabet letters which correspond to the instructions.
Mimi Farmer
Oct 25, 2014
Just getting started .. using holiday red since the hints to Holiday :)
ntrana0201 1327468
Oct 25, 2014
I could not find where is tells me what color to start with. I am going to guess that I use the red? Thanks!
tcandpc1 7264894
Oct 24, 2014
I like a mystry, just uploaded my pics, and it looks like a bowling pin with eyes
ariahlynn 0919327
Oct 22, 2014
Can someone tell me how to post a picture. It says that they will make it super easy but I don't know how? I have it ready to post but am lost now. Plus are the people doing this answering questions that you ask them?
Simone Collins
Oct 23, 2014
Just click on the Add Your Link button below the pictures you see above. Hope that helps. :)
Editor for AllFree CrochetAfghanPatte rns
Oct 23, 2014
There is an "add your link" button above that allows you to post your photos. Thanks for your patience, Editors of AllFreeCrochet
tcandpc1 7264894
Oct 24, 2014
Hi, I just went to the spot where it says share images, and it says they will be added to the sight after they have been reviewed. Hope this helps
Hook Yarn Stitch
Oct 21, 2014
I have tried three times to add a picture. First on Sunday, again on Monday and now again. It shows that it is loading each time. Please help!
Editor for AllFree CrochetAfghanPatte rns
Oct 23, 2014
There is an "add your link" button above that allows you to post your photos. If it still tells you that it's loading perhaps you can try a different browser. I don't think that's an issue on our end, but something with the program that we are using in order to upload photos. Thanks for your patience, Editors of AllFreeCrochet
cookiecat21 773559 2
Oct 21, 2014
I just tried adding photos for the third time I must be doing something wrong or I need to wait. So If you see three sets of pics from me you'll know why. Sorry.
Mays Creations
Oct 21, 2014
Can anyone help me? I have a camera but do not know how or where to send the photo
AliciaS1993
Oct 21, 2014
I think you're supposed to click the blue button that says "Add your link" and complete the required portions of the form it takes you to...? That's what I did and it showed up...
Editor for AllFree CrochetAfghanPatte rns
Oct 23, 2014
There is an "add your link" button above that allows you to post your photos. Thanks for your patience, Editors of AllFreeCrochet
Bigredmama03
Oct 21, 2014
Finished to Round 25. I'm waiting on my eyes to be delivered. If I continue on until I need to start stuffing, will it be impossible to add the eyes?
Editor for AllFree CrochetAfghanPatte rns
Oct 21, 2014
You'll definitely need to add the eyes before closing up, obviously. Next week's instructions are separate from these, so if you don't close up until next week I think it'll be okay. We don't join pieces until the very end.
cookiecat21 773559 2
Oct 21, 2014
I posted one pic for week one showing all the items needed and a pic of what I got done last night. Mine looks like a little red alien. Lol. I wish that the instructions had said how far apart to put the eyes. I still have no idea what it's going to be. I love a good mystery. I am looking forward to the surprise.
cookiecat21 773559 2
Oct 21, 2014
You will notice that wrote the letter code, for each color yarn, on the label for easy reference.
cookiecat21 773559 2
Oct 21, 2014
Ok. I fixed my pics. I selected them but not sure if it they were sent. There was no send button.
cookiecat21 773559 2
Oct 21, 2014
I tried uploading my photos that I took on my phone this morning but it's telling me that they're to large. Not sure what to do now.
Editor for AllFree CrochetAfghanPatte rns
Oct 21, 2014
You'll need to resize them so that they'll fit. Thanks, Editor of AllFreeCrochet
ariahlynn 0919327
Oct 22, 2014
I had to set my resolution a lot lower so the file would be small enough.
AliciaS1993
Oct 20, 2014
I had fun making this :) I got so confused, I thought it would be like a snowman or something, I went and looked at the color at least 3 times to make sure I was reading it correctly! Haha!! Can't wait for next week :) And... I put my eyes a little too close together... Hope it doesn't interfere with the outcome of my little project!
Hook Yarn Stitch
Oct 20, 2014
How long does it take for a picture and comment to show up? I just made a comment and rated. Neither have shown up.
Hook Yarn Stitch
Oct 20, 2014
I really enjoyed working out this...I can't wait for next week to get more instructions. I tried to post a picture last night. Tried again a few minutes ago...it still states that there are no pictures to view.
cookiecat21 773559 2
Oct 20, 2014
Lol, I was surprised that it started with the red. I was going to guess it was going to have a white body. I was thinking snow person. Now I'm clueless. This is fun.
Tank
Oct 20, 2014
Thank you for your reply. I see now that it states the hook and letter. I forgot about the color code included with the instructions. Now I can get started! Thanks again!
Tank
Oct 20, 2014
Maybe I missed it, but can you tell me what color you are beginning this project with, or does it matter? The video shows green, but the instructions do not mention the color; that I saw anyway. Thanks! Can't wait to get started!
jenykahayes 945608 7
Oct 20, 2014
Refer to the materials list from the first week. The colors should be listed with the letters.
jenykahayes 945608 7
Oct 20, 2014
Looks like the cherry red is color "A" that they are starting with. I think the video is just an example of how to do it. There is a picture of the finished thing and it is red. Hope this helps, I'm excited to get started
Report Inappropriate Comment
Are you sure you would like to report this comment? It will be flagged for our moderators to take action.
Thank you for taking the time to improve the content on our site.