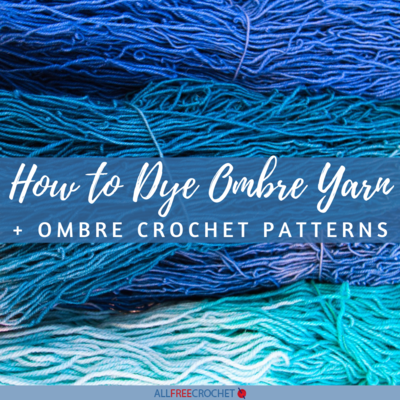
How to Dye Ombre Yarn + Ombre Crochet Patterns
Create the most beautiful projects with this gradient dyeing yarn tutorial!

If you've ever dyed yarn before, you know it can be a really fun and creative experience. Usually, when dyeing variegated yarn, it's a very forgiving process; if two colors mix in a way you weren't expecting, it's more of a happy surprise.
However, when ombre dyeing yarn, otherwise known as gradient dyeing, it's important to keep each color variation carefully separated. This is because the yarn moves evenly from one color to the next throughout the skein, rather than back and forth between multiple colors.
Mistakes can be disastrous--especially when the process itself is so messy! That's why we're sharing this guide on how to dye ombre yarn. After you carefully dip-dye yarn, you're left with some seriously beautiful and trendy material, perfect for a winter hat or a lacy summer shawl.
You're honestly not going to be able to do it just once. Ombre dyeing your own yarn is also very cost-effective because if you buy it from a store or online, ombre yarn costs over $35 per skein. So, once you learn how to dye gradient yarn and perfect it, you will be able to save money and even sell your product!
Ombre yarn crochet patterns are so incredibly gorgeous that anything you make with this technique is sure to bring you so many compliments.
Table of Contents
What is Ombre Yarn?
Ombre is French for "shaded" and that's exactly what you'll see with anything described as "ombre." A simple explanation is a color shading that goes from light to dark (or dark to light) but this can be achieved in a few different ways.
When it comes to yarn, the dyeing process can create shading to offer variegation unique to the ombre look, either with one color or with multiple colors that work well together.
One main color can be used, with the shade going from the lightest version to the darkest version of that color. Sometimes it goes to light again (which you'll see with many of the free patterns we're sharing on this page.
You can see the "one" color version in this Deep Blue Sea Hat shown below. Note how subtle the change from one shade to the next appears.

Another way to achieve ombre is to involve white or black to further create a difference in the colors. For example, this Ombre Moss Stitch Cowl shown below uses shades of purple from dark to light but ends with white to give it a striking look from one end to the other.
Another note about this technique is that, unlike the hat above, this has more of a color-blocking look with cleaner lines between each shade.

One additional example is the use of different colors that work in an ombre scheme. The Striped Ombre Tote Bag shown below uses white, blue, and purple which results in a pleasant shaded appearance.

Ombre Yarn Dyeing Tutorial
This tutorial explains exactly how to dye yarn that will have the ombre look you're wanting to achieve for crochet or knitting projects.
Materials
- 1 skein of natural fiber yarn (some of the most common are wool, cotton, merino, alpaca, and bamboo)
- 1-3 bottles of Rit dye (in each of your preferred colors)
- 5-6 disposable cups
- A mat to keep your space clean
- Vinegar and/or salt (depending on the fiber contents of your yarn)
- Tongs or chopsticks
- Rubber gloves (optional)
- Plastic wrap
- Microwavable plate
Preparing Your Yarn
- Before you can begin the dyeing process, you must decide what colors you want and what kind of yarn you would like to dye. I chose Patons Classic Wool Worsted in the snow white color; this can be found in many chain craft stores.
You may choose to buy a nicer yarn, but it's certainly worth testing on a cheaper yarn to get the feel for the dyeing process before you accidentally ruin a really nice skein.
- Begin by creating mini-skeins of yarn by taking the end and wrapping it around your fingers. Count the number of times you wrap the yarn around your fingers to keep it consistent, and then tie each mini-skein off loosely in the center with some scrap yarn or other string.
I wrapped each mini-skein around my hand about 100 times and ended up with a little over 6 mini-skeins.
- Do not cut the skeins apart from each other; leave them attached.
- If you can, cut off about two yards of the yarn for testing purposes.
Preparing the Yarn Soak
- Gather a bowl full of warm water; the bowl must be big enough to house all of the yarn that you tied off.
- Depending on the fiber contents of your yarn, add about a quarter cup of vinegar or a quarter cup of salt. Generally, animal-based yarns need a vinegar bath, and cotton yarns need a salt bath.
- Add about 1/8 cup of dishwashing liquid into the bath.
- Let the mini-skeins soak inside of the bath for about 20 minutes.
- If you were able to sacrifice some test yarn, also let this soak.
Prepare Your Work Space
- Prepare a well-covered area; things will get messy. Outside is recommended, but otherwise, if you can sacrifice a towel or two, those will work indoors as a surface.
- Take your 5-6 cups and fill them with warm water. Spread them out in a row on the towel.
- If your desired project allows you to use less yarn than you have and you were able to save some test yarn, bring it to your working surface.
- Here's where you get creative; if you're looking to go from white to a single color, take your single dye and add a few tablespoons worth into the cup farthest to the right. Gradually add fewer and fewer, moving right to left.
- If you chose multiple colors, take the darkest color and add a few tablespoons into the cup farthest to the right; in the next farthest cup, add less of that color, and maybe a tablespoon of the next color.
- Essentially what you're doing is gradually moving from cup to cup the way you want the colors to look on your yarn. There is no one way to measure this, which is why test yarn is highly useful.
Remember, you can always add more dye, but starting over because you added too much to begin with can be a pain (and a waste of dye!).
- Take your test yarn, and cut it into one to two-inch pieces. Try dipping each piece into a cup of water and dye, and let them soak for about 3 minutes.
- Take them out, and compare them side-by-side. Add dye wherever necessary, or start over if the test yarn is more saturated in color than you would like.
- Repeat Steps D-H until you are pleased with the results.
Dyeing the Yarn
- Rinse the mini-skeins in cool water.
- Separate the mini-skeins in front of the cups depending on how you would like the dye to look. Be careful to move down the skein without tangling anything; this will save you a lot of work later!
- Soak each mini-skein individually in the cups for about 3 minutes.
- Be certain that half of the connecting yarn between mini-skeins is also saturated.
- Use tongs or chopsticks to remove skeins from dye bath; rinse between skeins, if possible.
- Move the yarn around within the dye bath to be sure that the dye reaches where the mini-skeins are tied off.
- Be sure you are pleased with the results; replace yarn in the bath and continue to soak if it does not saturate very well.
Setting the Dye
- Take your plastic wrap and, wearing your rubber gloves, transfer each mini-skein onto its own separate sheet of plastic wrap, and wrap around the skein. Be careful not to let the skeins touch each other, as the dye may mix.
- Place the wrapped skeins on a microwaveable, preferably disposable, plate.
- Place in the microwave and microwave on high for 15-second intervals for about 1 minute. Allow to sit for about 30 seconds between each interval.
- Remove the dyed yarn and move to the sink.
Completing Your Yarn
- Using the rubber gloves, rinse each mini skein separately beneath hot water until the water runs clear.
- Wind yarn around your hand and arm until it's in a large, loose skein.
- Drape outside somewhere and allow to dry under the sun; if this is not possible, drying it inside will also work, although it will take longer.
- When yarn is completely dry, wind into a ball. Hold the color which you would like to appear last in your project first, and wind until the color which you would like to appear first is on the outside.
12 Ombre Crochet Patterns
All of these crochet patterns are made either to resemble an ombre design or you can use your homemade ombre yarn in these patterns to make the color changes more natural and fluid.
Whether you're looking for an ombre crochet blanket pattern or a colorful shawl or scarf to brighten up your wardrobe, you'll love how stylish all of these patterns are.
- Ombre Arrows Afghan - An easy crochet afghan that is also modern, this Ombre Arrows Afghan will make the perfect DIY home decoration.
- Tropical Stripes Market Bag - This gorgeous and cheerful tote bag will be your go-to over the summer months. It would make a wonderful beach bag.
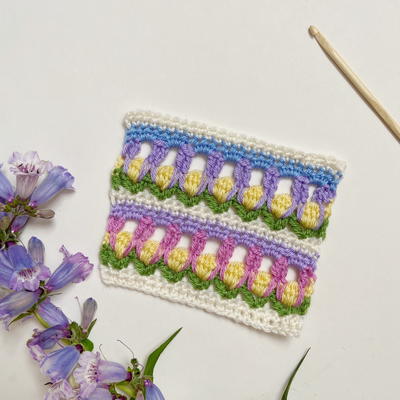
- Petals Mod Scarf - SHOWN BELOW! You'll be the most stylish girl around with this pink ombre scarf. The detailed border makes it even more special.

- Granny Ripple Wrap - Between the ombre design and the tassels, this wrap is so interesting. The granny ripple stitch used really brings out the ombre coloring.
- Enchanted Sun Dress - This flattering dress with a flared bottom is perfect for sunny days. Pair it with a small belt and be prepared for tons of compliments.
- Ombre Crochet Afghan Pattern - SHOWN BELOW! Because this pattern uses simple stitches, this afghan works up very quickly. You will enjoy watching the shaded, graduated tones appear before your eyes with each crocheted row.

- Deep Blue Sea Hat - If you're looking for a stunning blue hat pattern, this one is for you. You'll get every shade of gorgeous blue when you make this hat.
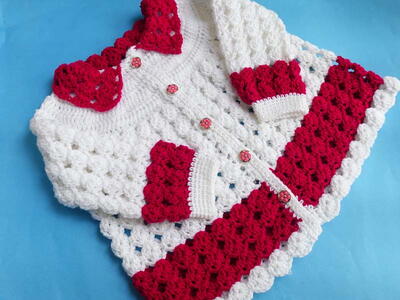
- Be My Valentine Ombre Hearts - For a day filled with love, what better way to celebrate than with these adorable hearts? These are way more fun than your average crochet hearts.
- Easy Ombre Baby Blanket - SHOWN BELOW! This bold purple blanket would make such an impressive baby shower gift. It looks so lovely but is very easy to make.

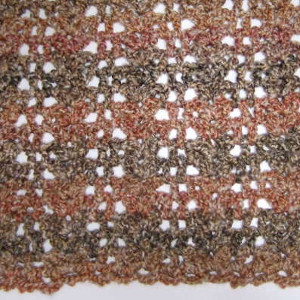
- Fades of Purple Shawl - This beautiful shawl is easy to make and fun to wear. The crescent triangle shape makes it such a comfy fit when you throw it over your shoulders.
- Gradient Granny Scarf - This sophisticated scarf is ridiculously pretty. It's a beginner pattern in such deep, rich colors that will take your outfits to the next level.
- Denim Ombre Wrap - SHOWN BELOW! This super soft and crazy cozy wrap is a must in every woman's closet. It's truly perfect for any occasion.

Up Next
How Much Yarn Do I Need? >>
Have you ever dyed yarn?
Let us know your tips and tricks!