How to Crochet with Hairpin Lace
Okay, you're ready to strike out and try your hand at more advanced crocheting with free crochet patterns. You've seen an intriguing tool either online or at your favorite yarn shop, but how do you crochet with it? It looks like 2 sticks (or metal bars) with cross braces: one at the top and one at the bottom. How do you work with it and where does the yarn go? It seems impossible.

The photos you've seen of hairpin lace are amazing. But when you look at the crochet instructions – oh my! Rotate? Flip? Twist? How can this possibly work? Don't panic. Working with a hairpin lace loom is actually easy and once you get into a rhythm, it's also soothing.
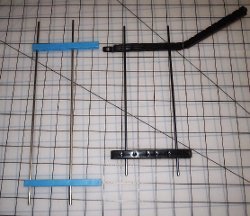
First off, there are different hairpin looms. In the image above, the blue loom doesn't open. You just slide the metal bars into the different holes in the blue plastic based upon the width of the strips you wish to make. The black loom opens and you can place the metal bars into the slots, again depending upon the strips. I have found that when I use the black loom, it helps to use binder clips to keep the bars tightly held in place.
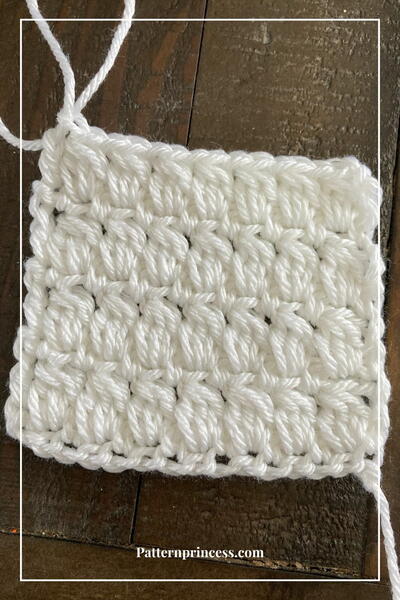
Almost all free crochet patterns include crochet instructions for making hairpin lace.
Here are the basics!
1. Set the loom to the correct width. Some patterns state “set the loom to 3 inches”, some just state “2 inch hairpin staple” (which translates to “set the loom to 2 inches”). I use my trusty measuring tape and measure from metal pin to metal pin.
2. Make a slip knot and slide on left side pin. If you are using a loom similar to the blue loom, just slide one bar out of the cross piece and slip your slip knot onto the bar and then reinsert. Now comes the tricky part.
3. Gently pull the loop loose, so that the knot portion sits in the center between the two metal pins. You will want your work to stay centered between the 2 pins. This is not as difficult as it sounds, as the technique itself keeps the crochet work centered.
4. Take yarn and wrap around right pin from front to back. You will have your slip knot and one loop on the left pin and the yarn around the right pin from front to back.
5. Slip crochet hook into the left loop from underneath – yarn over – draw the hook back out, yarn over and draw through 2 loops (create a sc).
6. Keep loop on hook and (now comes the odd part) rotate hook to back of loom. I keep the loops at the bottom of the loom and lift the hook between the metal pins, handle up and pass to the back.
7. Rotate loom clockwise so that hook is back in front, slip hook into the left loop formed in the rotation, make another sc.
8. Keep creating loops on each pin, following the pattern for the exact number called for. If you are creating a large project such as a shawl, you may be creating more than 100 loops in a strip. A great tip is to take safety pins (standard size is perfect) and slide the safety pin through groups of 10 loops and fasten.

9. After you have reached the correct number of loops (on both pins) you will have a completed strip. Here you will fasten off your yarn. Now the beautiful patterns begin.
10. You will work down one side of loops (be careful not to twist the strip). Each pattern will have you take a specific number of loops (the shawl created in these images is worked in 5 loop groups.)
11. Attach your yarn in the first 5 loops of your strip from right to left. Create a sc. Now you will often make chains between this first group of loops to the next set of 5 loops. You will create another sc in the 5 loop group (or however many loops the pattern calls for). You can see the chain edging begin in the top of the photo below.

This chain edge will continue the entire length of the strip, across the top and down the other side of the strip. From this point, you will follow the specific pattern crochet instructions for building a framework around your strips. Some patterns will have you edge each strip with your pretty twisted loops and then join the strips together later (as in the shawl shown here).
Some patterns will have you join your strips as you work the areas between, as the second vintage shawl free crochet pattern listed below.
I wish I could say that there were tons of free hairpin lace crochet patterns online, but sadly, there aren't an over-abundant supply. But the patterns that are out there are pretty awesome.
Here is one of my favorites:
Red Heart Yarn's Lacy Hairpin Shawl – I've made this in 2 weekends for a friend who graduated with honors from the university. I used Caron's Dazzleaire yarn in a soft bone color and it turned out beautifully.
Read NextHow to Crochet a Choker or Headband
Your Recently Viewed Projects
Thanks for your comment. Don't forget to share!
JaneEK
Jul 25, 2017
I found a hairpin lace loom marked down to $2, and even though I hadnt a clue how to use it, I just couldnt resist. The instructions that came with the loom left quite a bit to be desired, so I was thrilled to see this entry. I have the kind that comes apart, so I appreciate the tip about the binder clips. Now Ill just have to remember where I put the little contraption and see if I can actually do it.
mhamel1 1025781
Apr 23, 2014
I am a beginner on this. Love the hairpin technique. How do I go about figuring how many loops I need for tops on sizes S, M, L, and XL? How do I measure?
mamabearcoe 660717 8
Jan 08, 2013
I is wonderful that you have directions for Hairpin Lace. My mother taught me how to do this type of crocheting about 40 years ago. Not to many people know how to do this & when they see the finished product, they are amazed at it. Thank You.
Report Inappropriate Comment
Are you sure you would like to report this comment? It will be flagged for our moderators to take action.
Thank you for taking the time to improve the content on our site.