Catherine Wheel Crochet Stitch Instructions
Learn how to crochet Catherine wheel stitch, which is one of the most stunning crochet stitches ever!
Catherine Wheel crochet is one of the most unique and beautiful stitches that a crocheter can learn and master. This stitch is also referred to as the Harlequin and starburst, so if you see either of those, you will recognize it from what you see here.
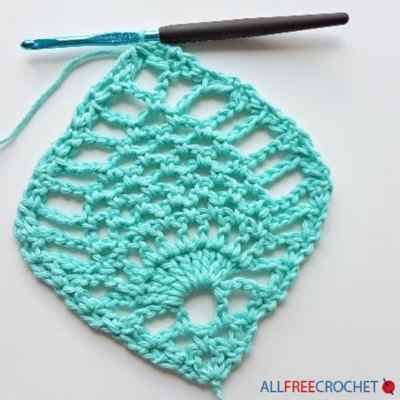
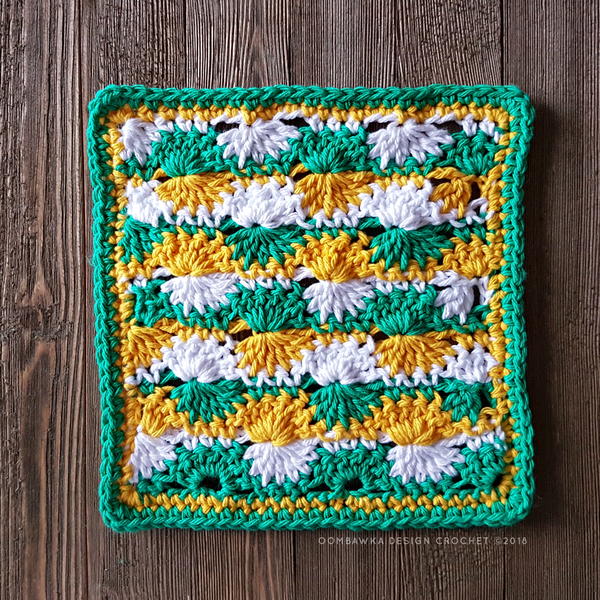
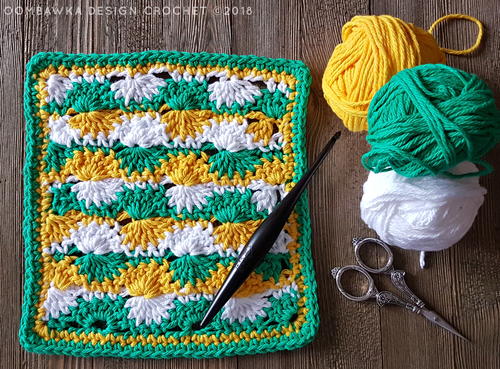
Speaking of learning and mastering, this stitch is at the intermediate level but it's not as difficult as it looks. To help you, this tutorial goes over all the details and walks you through the steps. You can use this tutorial to practice this stitch by step or follow it completely to make the finished 8 x 8 square that is shown here.
The beauty of this stitch is that you can make full wheels of one color, like this version on AllFreeCrochetAfghanPatterns, or change up the color so that each half of the wheel is different, like the pattern in this tutorial. Multiple colors give it a completely different look versus just the one but all result in a stunning crochet piece that you will be proud to show off.
This tutorial was written by Rhondda Mol from Oombawka Design Crochet. Visit her site for lots of tips for beginners, crochet tutorials, free patterns, round-ups, and more!
PLUS! Don't miss our bonus section of free Catherine wheel crochet patterns. You will see how much you can do with this beautiful stitch, from hand warmers and home decor to full afghans.
Catherine Wheel Crochet
The Catherine Wheel Stitch Pattern is worked back and forth in rows. It can be crocheted in a solid color, 2 colors, or 3 colors.
This tutorial will demonstrate how you can crochet the Catherine Wheel Stitch in 3 colors. To make your project with 2 colors instead, work Step 1 and Step 2 in Color 1. Switch to Color 2 for Step 3. Then work Step 3 and Step 4 in Color 2. Switch back to Color 1 for the next 2 Steps and continue in this fashion until you have reached the length you want for your project.
Notes:
- The images follow the written instructions for each Step. CLICK ON ANY PICTURE TO ENLARGE.
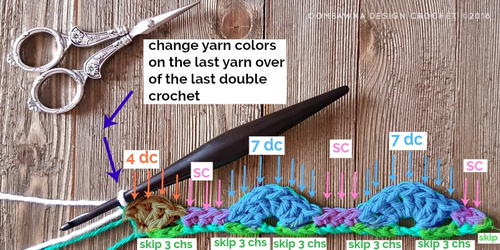
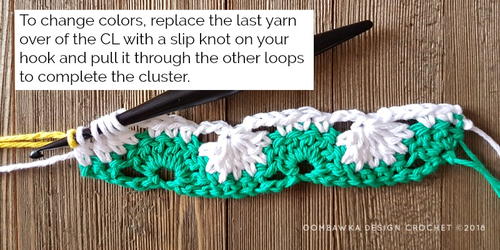
- This stitch can be worked in one color, 2 colors or even 3 colors. When color changes are made they are made on the last yarn over of the last stitch of the row. If you prefer, you can alternately finish off each color at the end of the row and join with your new color for the beginning of the next row.
- Carry your unused yarn up the side of the project. Be sure to carry the yarn loosely or else the edges of the project will become too tight and they will pucker and cause the project to bunch up on the sides.
- If you are carrying your yarn up the side edges you can easily cover it when you are working your edging rounds.
- Color pattern repeated for this sample: Color 1(green), Color 2 (white) and Color 3 (yellow)
Stitch Multiple:
Chain a Multiple of (10 + 6), + 1 for the base chain
This means if you are working this stitch in the middle of an ongoing project, like an afghan, you will need a multiple of 10 + 6 stitches to create the repeat.
If you are beginning a new project with this stitch, you will need to have a multiple of 10 + 6 for the pattern repeat, plus 1 more chain to begin (the initial turning chain).
Abbreviations:
beg - begin
ch / chs – chain / chains
CL – cluster
dc – double crochet
ch3sp - chain 3 space
R – row
RS – right side
rep - rep
sc - single crochet
sk - skip
st / sts - stitch / stitches
WS – wrong side
* – Repeat the instructions between the asterisks the number of times indicated. This repeat will contain of multiple instructions.
[] – at the end of the row – the total number of stitches
Special Stitches:
Cluster
*Yarn over the hook, insert the hook into the specified stitch, yarn over and pull up 1 loop. Yarn over and pull through 2 of the loops on your hook.** Rep from * to ** over the number of stitches indicated, yarn over, and pull through all the remaining loops on your hook to complete the stitch.
Note: The Cluster stitch will either be worked over 7 stitches (like a dc7tog – double crochet 7 stitches together), over 4 stitches (like a dc4tog – double crochet 4 stitches together) or over 3 stitches (like a dc3tog – double crochet 3 stitches together).
Catherine Wheel Crochet Stitch Instructions:
-
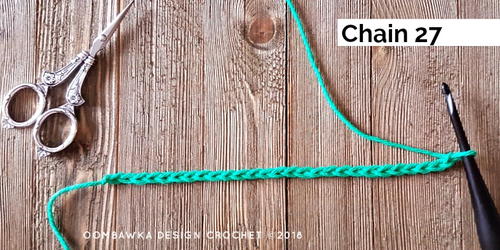
Color 1 (green): Chain a multiple of 10 + 6 stitches, plus 1 extra for the base chain. For this example, I chained 27 stitches. Using Medium Weight Cotton Yarn [4] and a 5 mm (H) hook this creates a project 7 inches wide.
-
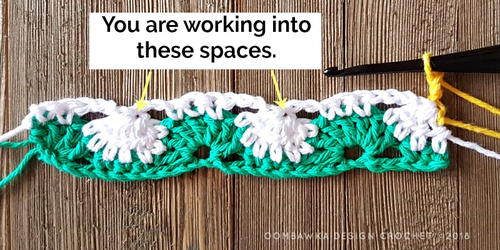
(WS) Continue with Color 1 (green). Sk 1 ch; work 1 sc in each of the next 2 chs. *Sk 3 chs, work 7 dc in the next ch, sk 3 chs, work 1 sc in each of the next 3 chs. Rep from * to ** to the last 4 chs. Sk 3 chs, work 4 dc in the last ch; changing yarn colors on the last yarn over of the last dc. Turn.
-
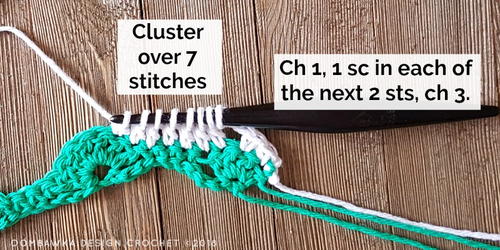
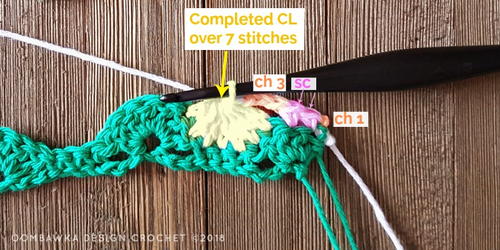
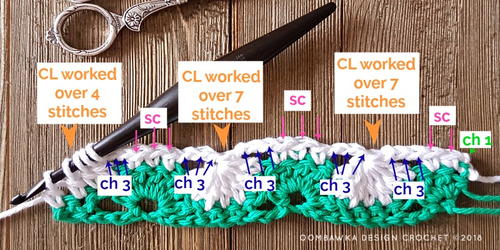
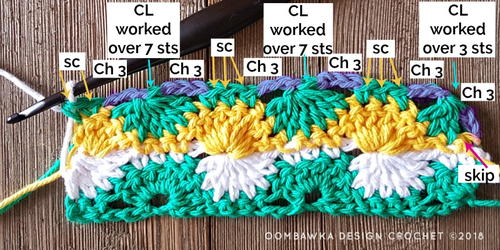
(RS) Color 2 (white): Ch 1, work 1 sc in each of the next 2 sts. *Ch 3, work 1 CL over the next 7 sts, ch 3, work 1 sc in each of the next 3 sts**. Rep from * to ** to the last 4 sts. Ch 3, work 1 CL over the next 4 sts, changing yarn colors on the last yarn over of the last st. Turn.
Note: You may wish to place a stitch marker on this side of the project to remind you it is the side which should be facing forward before you add your edging. -
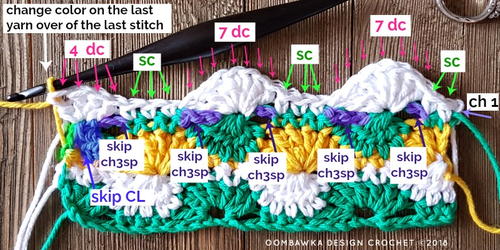
Color 3 (yellow): Ch 3 (counts as 1 dc), 3 dc in the first st (Note: this is the stitch at the base of the ch 3 you just made). *Sk the ch3sp, work 1 sc in each of the next 3 sts, sk the ch3sp, work 7 dc into the top of the CL**. Rep from * to ** to the last ch3sp. Sk the ch3sp and work 1 sc in each of the last 2 sts, changing yarn colors on the last yarn over of the last stitch. Turn.
-
Color 1 (green): Ch 3 (counts as 1 dc), sk the first st, work 1 CL over the next 3 sts. *Ch 3, work 1 sc in each of next 3 sts, ch 3, work 1 CL over the next 7 sts**. Rep from * to ** to the last 2 sts. Ch 3, work 1 sc in each of the next 2 sts (Note: the last st is worked in the initial ch 3 from Step 4 - which we are counting as 1 dc). Change your yarn color on the last yarn over of the last sc of the row. Turn.
-
Color 2 (white): Ch 1, 1 sc in each of the next 2 sts. *Sk the ch3sp, work 7 dc into the top of the CL, sk the ch3sp, work 1 sc in each of the next 3 sts**. Rep from * to ** to the last ch3sp, CL and dc. Sk both the ch3sp and CL and work 4 dc in the last dc (Note: the last dc is the initial ch 3 from Step 5 – which we are counting as 1 dc). Change your yarn color on the last yarn over of the last sc of the row.
-
Repeat Steps 3 to 6, alternating colors in the same order until your project reaches your desired length. I repeated my square for 15 Steps before working my edging. Be sure to check to see your RS is facing forward before adding the edging.
-
Finishing
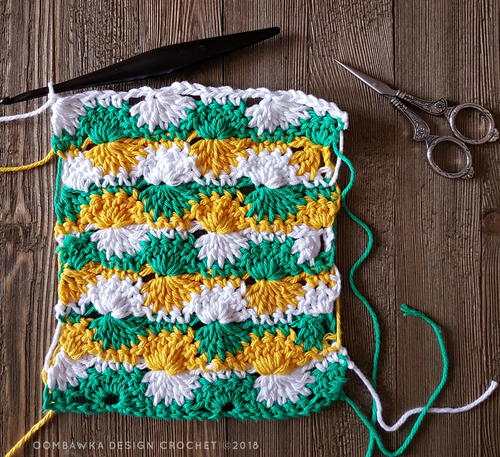
When you carry your yarn ends up the side of the project you will have loops of unused yarn like in the image above. These can be concealed easily when you work your single crochet edging around your finished project. Instead of working into one loop of the final stitch on the row, work over the yarn end and one loop of the final stitch of each row.
To edge my square, I worked 1 round of sc stitches evenly around (3 in each corner). I worked approximately 3 sc for every dc row end st (on the sides) and 1 sc for the sc row end st (on the sides).
For the second edging round, I changed colors and worked 1 sc in each st around and 3 sc in each corner, before finishing off and weaving in my ends. The finished square is approximately 8 inches by 8 inches.

BONUS! Free Catherine Wheel Patterns:
Now that you've learned in detail how to crochet the Catherine wheel, we have some free patterns for you to try. From wrist warmers to afghans, there is something for everyone here.
As you can see, this stitch is so stunning and works on all sorts of crochet pieces. Because of the variation in this stitch, the options to customize are vast.

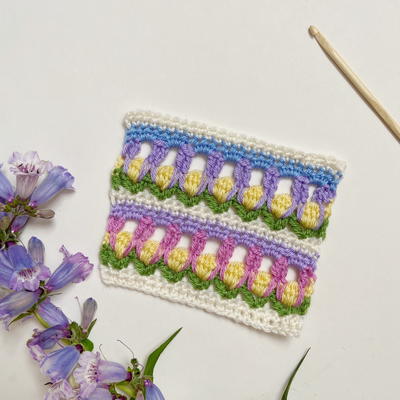
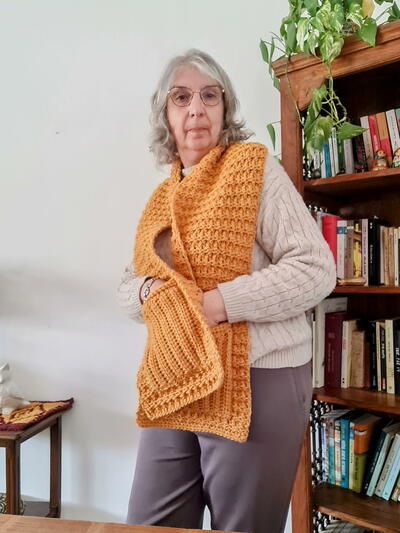
How gorgeous are these wrist warmers? They would make a lovely gift for your daughters, grandchildren, or friends! They can be made in the popular ombre style or with her favorite colors.

Make a beautiful and bold throw using the Catherine wheel. The appearance of this resembles ripples or stripes or some other interesting design. No matter what you see, you'll love making and using it.

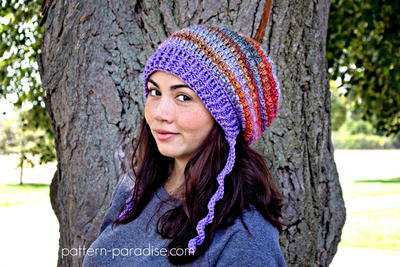
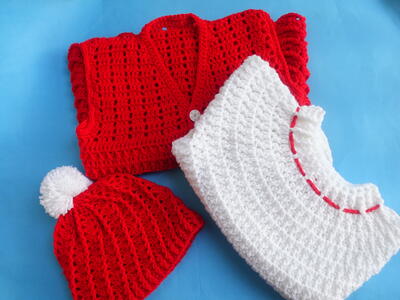
This fun hat shows how you can make the half wheels shine. Make this in feminine pink and purples or change up the colors to be more masculine or seasonal, depending on who you're making it for.

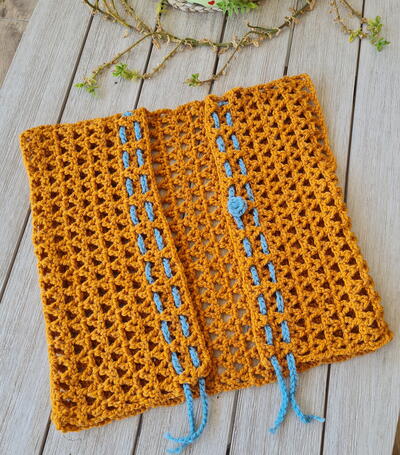
Add a creative and stylish addition to any outfit with boots by making these Catherine cuffs. These boot cuffs are easy and fun to make. They'll keep you warm while giving your outfit a bit of pizzazz.

Bright and cheery is the best way to describe this blanket. Use the same colors to make an almost ombre shade that results in a gloriously vibrant piece you'll love (and so will everyone who sees it).
Read NextSirtaki Relief Crochet Stitch
Your Recently Viewed Projects

Thanks for your comment. Don't forget to share!
JaneEK
Mar 30, 2018
I grew up in a Commonwealth country, so when I hear Catherine Wheel, I immediately think of a yummy jelly roll dessert! When I came back to crochet as an adult, I had to adjust my thinking. This is a wonderful tutorial for anyone wanting to learn this stitch, and theres the added bonus of having actual projects to try out your new skill.
Hippie Chick
Mar 16, 2018
The colors used in her project are awesome. I dont usually like green but this shade looks very nice used with this shade of yellow. The tutorial shown could also be used to make a spa cloth, dish cloth, or wash cloth as it turns out to be the perfect size. This stitch is thoroughly explained and is easy to understand.
mulberrygalprinces s
Mar 07, 2018
What a cute stitch. I have been crocheting for 50 years and I am still learning new stitches or techniques. This doesn't look that hard so I really do want to give it a try. Maybe this old dog really can learn a new trick after all. Thanks for sharing!
Report Inappropriate Comment
Are you sure you would like to report this comment? It will be flagged for our moderators to take action.
Thank you for taking the time to improve the content on our site.