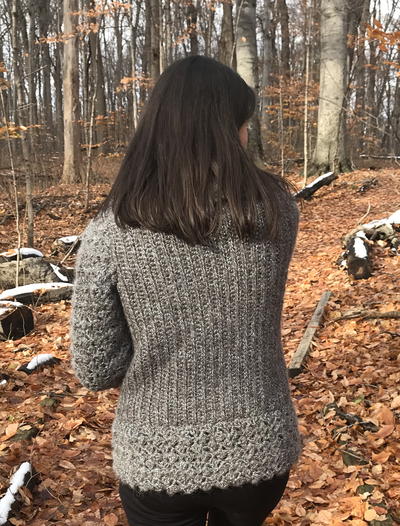
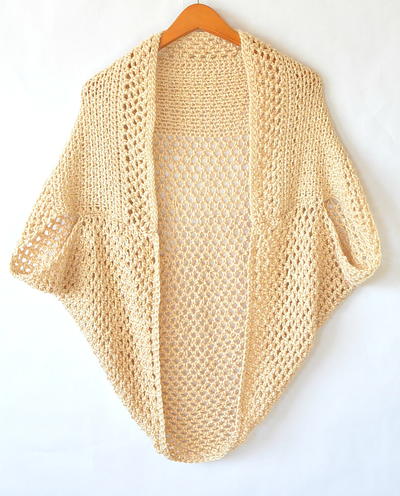
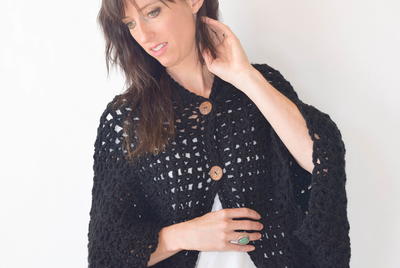
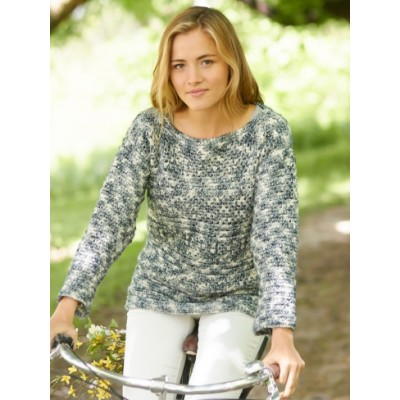
Cross-Over Jumper
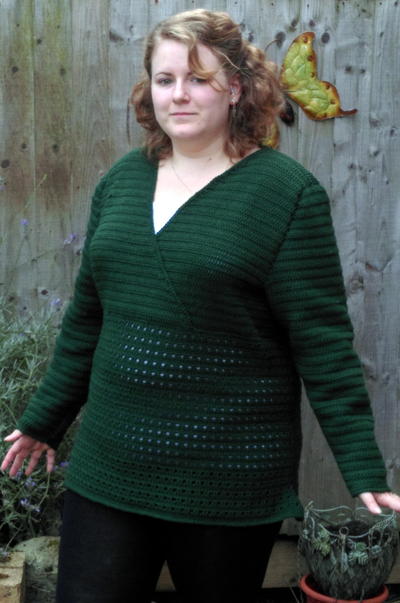
"Nice cross-over jumper with a dotty decorated bottom half."

Crochet HookG/6 or 4 mm hook
Yarn Weight(3) Light/DK (21-24 stitches to 4 inches)
Crochet Gauge5dc across= 1in
5 rows dc = 2in
Finished SizeUk size 16 (but loose fit for clothing underneath)
Materials List
- 4mm crochet hook
- Wool needle
- 8, 100g balls of dk wool (or more/less depending on your size. Mine took literally 7 1/4 balls!!)
This pattern was designed by and for myself. Roughly its UK size 16, but with enough room to get t-shirts etc underneath without tightness. To scale for yourself, use the tension gauge to work out how many stitches to increase or decrease by. Also, depending on the size of your boobage, you can cross-over more or less when stitching that part together.
Back
Ch127. Fd: I dc into 4th ch from hook, 1 dc into each ch to end, ch3, turn (125) Rd1: I dc into the next dc, *ch1, sk1 dc, 1 dc into next 2 dc* rep from *to* to end. Rd2: Sl st 2 dc, sl st into ch sp, ch 2, *dc into next 2 dc, 1 dc into ch sp*rep to last ch sp (121) Rd3: Sl st 1 dc, ch 2, dc into next dc,* ch 1, sk next dc, 1 dc into next 2 dc* rep from *to* to end. Rd4: Sl st 2 dc, sl st into ch sp, ch 2, *dc into next 2 dc, 1 dc into ch sp*rep to last ch sp (117) Rd5: Sl st 1 dc, ch 2, dc into next dc,* ch 1, sk next dc, 1 dc into next 2 dc* rep from *to* to end. Rd6: 1 dc into next dc, *1 dc into ch sp, 1 dc into next 2 dc*, rep from * to* to end, ch3, turn (113). Rd7: 1 dc into next dc, *ch1, sk 1 dc, 1 dc into next 2 dc* rep from *to* to end, ch3, turn. Rd8: 1dc into next dc, *1 dc into ch sp, 1 dc into next 2 dc*, rep from *to* to end, ch3, turn. Rd 7&8 set pattern. Rep 15 sets more. Place st marker at beg of rd 39. Rd39: 1 dc into each dc to end, ch3, turn. Rep rd39 14 times more. Rd53: Sl st 16 dc, ch 3, 1 dc into each dc to last 15 dc, ch3, turn. Rd54: 1 dc into each dc to end, ch3, turn. Rep rd54 24 time more. Tie off and leave a long tail.
Front Right
Ch83. Foundation Place hook in 4th ch from hook (first ch3 counts as dc). Dc into each chain to end. Ch3, turn (81) Rd1: Dc into each Dc. Dc into ch3 (81) Rd2: Dc into every Dc until last two Dc. 1 Dc, ch3, turn (80) Rd3: Sl st to 2nd Dc, Dc into each Dc to end. Ch3, turn (79) Rd 2&3 set pattern. Work 5 sets more (69) Shape Armhole: Rd1: Sl St 16 Dc, ch3, Dc to last 2dc, 1 dc (53) Rd2: Sl st to 2nd Dc, ch3, dc to end (47) Rd3: Dc into each Dc to last 2Dc, 1 dc (51). Rd 2&3 set pattern. Work 11 sets more, then repeat rd 2 once more (28). Finish off.
Front Left
Ch 83. Foundation: Place hook in 4th chain from hook (first ch3 counts as dc). Dc into each chain to end. Ch3, turn (81). Rd1: Dc into each Dc, Dc into ch3 (81). Rd2: Sl st to 2nd Dc, Dc into each Dc to end. Ch3, turn (80). Rd3: Dc into every Dc until last two Dc. 1 Dc, ch3, turn (79) Rd 2&3 set pattern. Work 5 sets more (69) Shape Armhole: Rd1: Sl st to 2nd Dc, Dc in each Dc to last 15 Dc. Ch3, turn (53) Rd2: 1Dc into each Dc until last two Dc, 1 Dc (51). Rd3: Sl st to 2nd Dc, ch3, dc to end (46). Rd 2&3 set pattern. Work 11 sets more, then repeat rd 2 once more (28). Finish off. Placing right sides together, line up the two front pieces with the back piece. You can ensure its lined up properly by having the armholes match. Using a sl st sew together the shoulder seams.
Front Edging
With right side facing and beginning on the right front piece: Fd: Sc 81 evenly, sc 39 across the back, sc 81 evenly across the left front side, ch2, turn. Rd1: 1 sc into each sc to end. Finish off.
Stomach piece
Attachment: With right sides facing and beginning on the right front piece: Yarn into ch3, ch2, 1 dc into next 41 ch, 1 dc into next ch AND 1st ch of left front piece, 1 dc into next 41ch of both pieces, 1 dc into next ch (left front piece only), 1 dc into next 41 ch, ch3, turn. Rd1: 1 dc into next dc, *ch1, sk 1 dc, 1 dc into next 2 dc* rep from *to* to end, ch3, turn. Rd2: 1dc into next dc, *1 dc into ch sp, 1 dc into next 2 dc*, rep from *to* to end, ch3, turn. Rd 1&2 set patt, rep 14 more sets, then rep rd1 once more. Rd18: 1 dc into same sp as chain, 1 dc into next two dc, *1 dc into ch sp, 1 dc into next 2 dc*, rep from *to* to last dc, 2 dc into last dc, ch4, turn. Rd19: 1 dc into 1st chain of the ch4, *ch1, sk 1 dc, 1 dc into next two dc*, rep from *to* to end, ch1, 2 dc into 2nd chain, of ch3. Rd20: 1 dc into same sp as chain, 1 dc into next two dc, *1 dc into ch sp, 1 dc into next 2 dc*, rep from *to* to last dc, 2 dc into last dc, ch4, turn. Rd21: 1 dc into 1st chain of the ch4, *ch1, sk 1 dc, 1 dc into next two dc*, rep from *to* to end, ch1, 2 dc into 2nd chain, of ch3. Rd22: 1dc into next dc, *1 dc into ch sp, 1 dc into next 2 dc*, rep from *to* to end. Finish off.
Lower Edging
Join Yarn, ch2, 1 sc into each dc or ch all the way along the lower edge of front and back, sl st to join. Ch2, 1 sc into each sc.
Sleeves (make two alike)
Ch 48. Foundation: Place hook in 4th chain from hook (first ch3 counts as dc). Dc into each chain to end. Ch3, turn (46) Rd1: 1 dc into same sp as ch3, 1 dc into each dc to end, 2 dc in last dc, ch3, turn (48). Rd2: (ch3 counts as dc), 1 dc into next and every dc to end, ch3, turn (48). Rd1&2 set patt, rep 21 sets more (90) Shape raglan: Rd1: Sl st 16dc, ch3, dc into each dc to last 15dc, ch3, turn (60) Rd2: Sl st 2dc, ch3, dc into each dc to last dc, turn (58) Rep dec 1 st off each end on each following row as shown with Rd2, 16 times more (26). Fasten off. Stitch sleeve sides together to raglan, stitch raglan edges to armhole evenly.
Sleeve edgings
Join yarn to sleeve edge. Rd1: Ch1, 1sc into the next 6st, 2sc into the next st, 1 sc into the next 10st, 2 sc into the next st, 1sc into the next 6st, 2sc into the next st, 1 sc into the next 10st, 2 sc into the next st, 1sc into the next 6st, 2sc into the next st, 1sc into the next 2 st, sl st to join. Rd2: Ch1, 1sc into the next 7st, 2sc into the next st, 1 sc into the next 11st, 2 sc into the next st, 1sc into the next 7st, 2sc into the next st, 1 sc into the next 11st, 2 sc into the next st, 1sc into the next 7st, 2sc into the next st, 1sc into the next 2 st, sl st to join. Fasten off. Weave in any loose ends. All done!
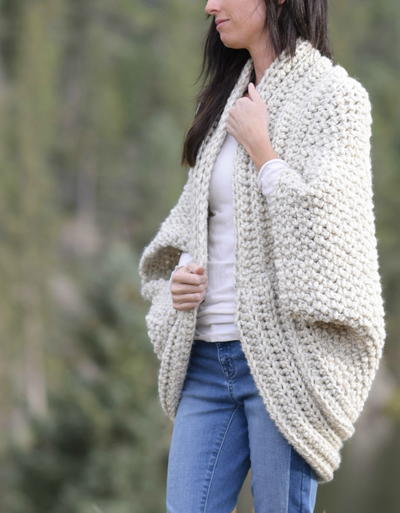
Read NextNew Beginnings Cardigan
Your Recently Viewed Projects
Thanks for your comment. Don't forget to share!
darlene2303 554354 6
Oct 30, 2017
is this written in U.S. terms or UK?
AFC Editor Julia
Oct 30, 2017
Hi darlene, I'm sorry, I'm not positive. It looks like this was a pattern submission, and it doesn't look like a website was included with her submission. I would guess US since we're an American website that she's submitted to? Julia, editor for AllFreeCrochet
Morehouse17
Sep 30, 2017
I appreciate patterns that are crocheted and then modeled for plus size girls. These are the items that I long to create because I see what it may would look like on me. I like this cross over design and I want to make this is a warmer color. Thanks again to the model/designer.
Delphine Bryant
Apr 05, 2017
When I read the title of this project "jumper" I was hoping for a dress. This is a beautiful pattern and it may be worthy to attempt. I guess I could increase the length of the stomach piece and create a dress. I love all things "cross-over" in a piece. A simple way to add interest.
Report Inappropriate Comment
Are you sure you would like to report this comment? It will be flagged for our moderators to take action.
Thank you for taking the time to improve the content on our site.