Makin' Squares Blanket Crochet Pattern
This "oversized granny square" blanket is easy to work up and beautiful in any color combination.

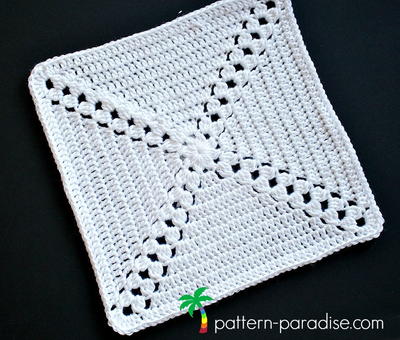
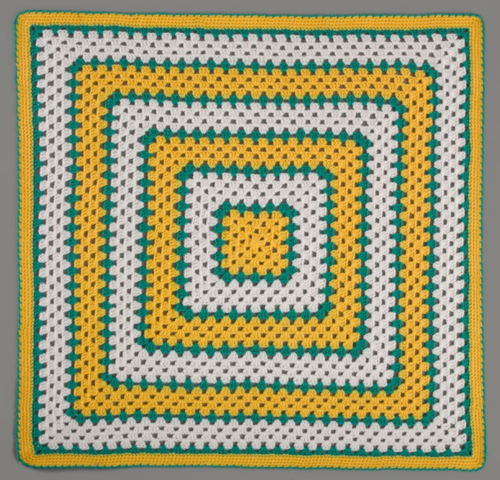
If you love granny square patterns, then you have to work up this Makin' Squares Blanket, which is crocheted in rounds like a supersized 39 x 39-inch granny square! This is an easy crochet blanket with clear instructions, so crocheting this will be a breeze.
Made with Red Heart Yarn that will be sure to inspire snuggling, this granny square afghan would be the perfect pattern to start on for a special little one—or to treat yourself.
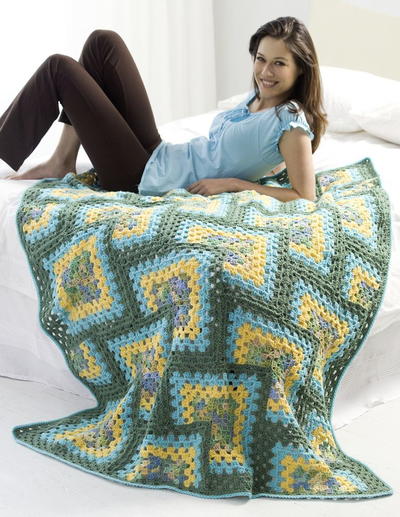
Although you can pick whatever colors you like, the yellow and green pattern winding out from the center promises to transport you to your very own yellow brick road and a crochet adventure.

Crochet HookI/9 or 5.5 mm hook
Yarn Weight(4) Medium Weight/Worsted Weight and Aran (16-20 stitches to 4 inches)
Crochet GaugeRounds 1–3 = 4 inches (10 cm); 3 pattern repeats and 1 dc = 4 inch. (10 cm). One pattern repeat consists of 3 double crochet and one chain-1 space; 6 rows = 4 inch. (10 cm). Check your gauge. Use any size hook to obtain the gauge.
Finished Size39 x 39 inches (99 x 99 cm)
Materials List
- RED HEART® Baby Hugs™ Medium: 2 balls each of 4201 Sunny A and 4001 Frosting C, and 1 ball 4562 Aloe B
- Susan Bates® Crochet Hook: 5.5mm [US I-9]
- Yarn needle
Special Stitch
-
reverse sc (reverse single crochet) = Work single crochet in opposite direction from which you would usually work (left to right if you are right-handed and right to left if you are left-handed). This stitch is also known as the crab stitch. It creates a rope-like twisted single crochet edging.
Special Technique
-
Join with sc = Place a slip knot on hook, insert hook in indicated stitch, yarn over and draw up a loop, yarn over and draw through both loops on hook.
Crochet Blanket Pattern
-
With A, ch 4; join with slip st to first ch to form a ring.
-
Round 1 (right side): Ch 2 (counts as first dc here and throughout), 2 dc in ring, *ch 3, 3 dc; repeat from * twice, 3 times in ring, ch 3; join with slip st in top of beginning ch—12 dc and 4 ch-3 spaces.
-
Round 2: Slip st in next 2 dc, slip st in first ch-3 space, (ch 2, 2 dc, ch 3, 3 dc) in same space, *ch 1, (3 dc, ch 3, 3 dc) in next ch-3 space; repeat from * twice, ch 1; join with slip st in top of beginning ch—24 dc, 4 ch-1 spaces, and 4 ch-3 spaces.
-
Round 3: Slip st in next 2 dc, slip st in first ch-3 space, (ch 2, 2 dc, ch 3, 3 dc) in same space, *ch 1, 3 dc in next ch-1 space, ch 1, (3 dc, ch 3, 3 dc) in next ch-3 space; repeat from * twice, ch 1, 3 dc in last ch-1 space, ch 1; join with slip st in top of beginning ch— 36 dc, 8 ch-1 spaces, and 4 ch-3 spaces.
-
Round 4: Slip st in next 2 dc, slip st in first ch-3 space, (ch 2, 2 dc, ch 3, 3 dc) in same space, *(ch 1, 3 dc) in each ch-1 space across to next ch-3 space, ch 1, (3 dc, ch 3, 3 dc) in next ch-3 space; repeat from * twice, (ch 1, 3 dc) in each ch-1 space to beginning ch, ch 1; join with slip st in top of beginning ch—48 dc, 12 ch-1 spaces, and 4 ch-3 spaces. Fasten off.
-
Round 5: With right side facing, join B with slip st in any ch-3 space, (ch 2, 2 dc, ch 3, 3 dc) in same space, *(ch 1, 3 dc) in each ch-1 space across to next corner ch-3 space, ch 1, (3 dc, ch 3, 3 dc) in next ch-3 space; repeat from * twice, (ch 1, 3 dc) in each ch-1 space to beginning ch, ch 1; join with slip st in top of beginning ch—60 dc, 16 ch-1 spaces, and 4 ch-3 spaces. Fasten off B.
-
Round 6: With C, repeat Round 5. Do not fasten off.
-
Rounds 7–9: Repeat Round 4. Fasten off at end of Round 9.
-
Round 10: Repeat Round 5.
-
Rounds 11–14: With A, repeat Rounds 6–9.
-
Round 15: Repeat Round 5.
-
Rounds 16–25: Repeat Rounds 6–15.
-
Rounds 26–30: Repeat Rounds 6–10.
-
Round 31: With right side facing, join C with sc in first dc after any ch-3 space, sc in each st and ch around working 3 sc in center ch of each ch-3; join with slip st in first sc—3-sc group at each corner.
-
Rounds 32–34: Ch 1, sc in each sc around working 3 sc in center st of each 3-sc group; join with slip st in first sc. Fasten off. Round 35:
-
Round 35: With right side facing, join B with sc in 3rd sc of any 3-sc group, *ch 1, skip next sc, reverse sc in next sc; repeat from * around; ch 1, skip last sc; join with slip st in first sc. Fasten off.
Finishing
-
Weave in ends. Click the image to enlarge.
Abbreviations
- A, B, C
- Color A, Color B, Color C, etc.
- ch
- chain(s)
- dc
- double crochet
- sc
- single crochet
- st(s)
- stitch(es)
- ()
- work directions in parentheses into same stitch
- *
- repeat whatever follows the * as indicated
Up Next
How Much Yarn Do I Need?
What was your first granny square pattern?
Your Recently Viewed Projects

Thanks for your comment. Don't forget to share!
mulberrygalprinces s
Sep 19, 2018
This is why I love granny squares. I leArned that pattern 50 years ago and I still love it. You can do so much with it. It's so easy. You can make different solid colored squares and connect them. Or use a bunch of colors in each square. Or go like this beauty.
Delphine Bryant
Jul 17, 2018
You can not go wrong with the classics. This makin' squares crochet blanket pattern from Red Heart Yarn is just that, a classic. No matter how many colors you select or how many rounds you create this blanket will soon be a favorite. When my boys were little they each had their own in there favorite colors. They took them with them to college and as far as I know, they still have them.
Morehouse17
Jun 30, 2018
With this granny square afghan laid out in all of its glory in yellow white and green it is stunning. Now I know that the typical baby blanket is not in black and white but would this not be a perfect stimulation blanket in those colors?
elocin1104 2800379
Nov 23, 2017
What an easy pattern! Its one giant granny square, which I love to make anyway! You could do this in any 3 colors, for anyone in your life. It would work up quickly, which is also a plus if you need something in a hurry. I love simple patterns like this one, and cant wait to get started making some!
Hippie Chick
Sep 01, 2017
Great pattern and it generated a lot of interest and interaction among home crocheters based on the number of pictures that have been shared of others that have completed this project in all sizes and colors. Looks like this would be a very nice baby shower gift because of the interest.
Hippie Chick
May 25, 2017
This pattern couldnt be any easier. Its basically one big square that you keep adding rows to until it is as big as you need. The color combinations and designs are as endless as your imagination. I would love to try to free style a project soon and may use this idea as a base.
Mary K
Nov 03, 2016
Working on this blanket now. Doing it in different colors though. For my husband's cousins baby boy. In Vikiking colors. Color A Purple, color B White and color C yellow almost done will include photo once finished. I am almost done. I did change a few stiches but if the hubby who has approved my work I think I am doing a great job and I myself am a Green Bay Packer fan I might have to make a bigger one for myself.
patricia5147 07786 46
Jul 14, 2016
I would love to make this blanket for my new great niece/nephew but would like the stripe to be never ending, like a square spiral, how would I do that please? I think the colours are gorgeous and hope to make a hat and booties to match..
Zeemer
Jul 02, 2016
Wow. This is another version of a granny square blanket I pinned earlier. Whoa. I would like to do all of them. Thanks for making it easy for crocheters by having the pattern right up front. Thanks a lot.
Report Inappropriate Comment
Are you sure you would like to report this comment? It will be flagged for our moderators to take action.
Thank you for taking the time to improve the content on our site.