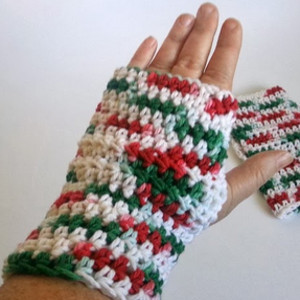
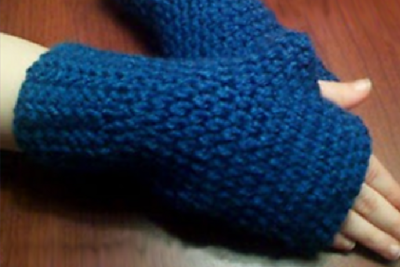
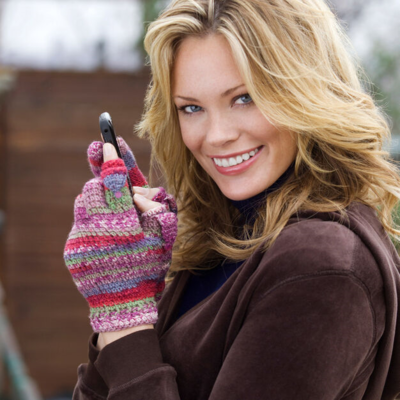
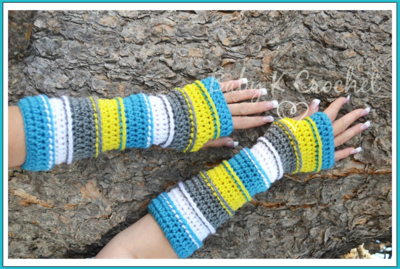
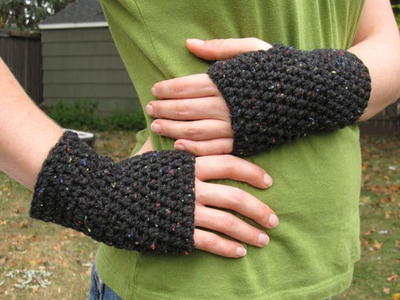
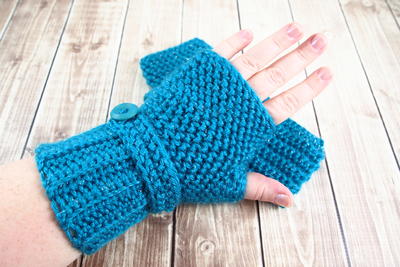
Herringbone Crochet Fingerless Gloves

Fingerless gloves, like the Herringbone Crochet Fingerless Gloves pattern, are the perfect fall accessory - they're great to keep your hands warm and cozy while still keeping your fingers free. This easy pattern features the herringbone half-double crochet stitch, a modified version of the half double stitch, making it an easy-to-work pattern. Use any color you want, or use a yarn with some shine to give your outfit that extra dazzle. Available in sizes child through large adult, this crochet fingerless gloves pattern will become your go-to fall accessory.

Crochet HookH/8 or 5 mm hook
Yarn Weight(4) Medium Weight/Worsted Weight and Aran (16-20 stitches to 4 inches)
Crochet GaugeIn HDC: 14 stitches and 12 rows = 4" (10 cm)
Finished SizeChild, Teen / Adult, Large Adult
Materials List
- Worsted weight yarn; I have used Red Heart Soft Sparkle
- 5.0 mm crochet hook or size needed to obtain the gauge
- 3/4" buttons (2)
- Yarn needle for weaving in ends
- Stitch marker
Child Pattern
(6 - 10 Years) • Palm circumference = 6" - 6.75" • Finished size = 6" around palm, 7" in length
-
Row 1: Ch 13, sc in 2nd chain from hook and in each chain across, turn (12)
-
Row 2: Working in back loops only - Ch 1, sc in first stitch and in each stitch across, turn (12)
-
Row 3 to Row 18: Repeat Row 2
Bring the ends of the cuff together and join by slip stitching through the Back Loops of Row 18 and the corresponding stitches of the beginning chain. -
The body of the glove will be worked in a spiral; do not join or turn your work. Use a marker to track rounds.
Round 1: Ch 1, sc in the end of the first row, HBhdc in the end of the next row and in each row back to start, do not join (18) -
Round 2: *HBhdc in next 8 stitches, make 2 HBhdc in next stitch*, repeat one time (20)
-
Round 3: Make 2 HBhdc in first stitch, HBhdc in each stitch back to start (21)
-
Round 4: Make 2 HBhdc in first stitch, HBhdc in each stitch back to start (22)
-
Round 5: Make 2 HBhdc in first stitch, HBhdc in each stitch back to start (23)
-
Round 6: Make 2 HBhdc in first stitch, HBhdc in each stitch back to start (24)
-
The next round will create the thumb opening.
Round 7: HBhdc in first 9 sts, chain 3, skip 6 sts and HBhdc in next stitch, HBhdc in next 8 sts (18 HBhdc, 3 chains) -
Round 8: HBhdc in each stitch around, including the 3 chs at thumb opening (21)
-
Round 9: HBhdc in each stitch around (21)
-
Round 10: HBhdc decrease, HBhdc in each stitch back to start (20)
-
Round 11: HBhdc in each stitch around (20)
-
Round 12: Loosely sl st in each stitch around, join in first sl st and fasten off (20)
-
Edging the Thumb Opening
Join in any stitch along the thumb opening.
Round 1: Ch 1, evenly place 13 HBhdc around the opening, sl st to join in first HBhdc (13)
Round 2: Ch 1, HBhdc dec first 2 stiches, HBhdc in next 5 stitches, HBhdc dec, HBhdc in next 4 stitches, sl st to join in first HBhdc (11)
Round 3: Loosely sl st in each stitch around, join and fasten off (11) -
Button Band (make 2)
Ch 12, HBhdc in 2nd chain from hook, and in each chain to end, make 6 HBhdc in last chain, continue working the opposite side of the chain back to start, fasten off, leaving a lengthy tail for sewing the band onto the glove. Attach the straight end of the band along the inner edge of the glove; secure the rounded edge by sewing through both the band and glove when attaching the button. Allow some slack for stretching over the hand. Repeat these steps for the second glove, making sure the strap goes the opposite direction so you have a right and a left. Weave in all ends.
Teen / Adult
Palm circumference = 7" - 7.75" • Finished size = 7" around palm, 7" in length
-
Row 1: Ch 15, sc in 2nd chain from hook and in each chain across, turn (14)
-
Row 2: Working in back loops only - Ch 1, sc in first stitch and in each stitch across, turn (14)
-
Row 3 to Row 22: Repeat Row 2
Bring the ends of the cuff together and join by slip stitching through the Back Loops of Row 22 and the corresponding stitches of the beginning chain. -
The body of the glove will be worked in a spiral; do not join or turn your work. Use a marker to track rounds.
Round 1: Ch 1, sc in the end of the first row, HBhdc in the end of the next row and in each row back to start, do not join (22) -
Round 2: *HBhdc in next 10 stitches, make 2 HBhdc in next stitch*, repeat one time (24)
-
Round 3: Make 2 HBhdc in first stitch, HBhdc in each stitch back to start (25)
-
Round 4: Make 2 HBhdc in first stitch, HBhdc in each stitch back to start (26)
-
Round 5: Make 2 HBhdc in first stitch, HBhdc in each stitch back to start (27)
-
Round 6: Make 2 HBhdc in first stitch, HBhdc in each stitch back to start (28)
-
Round 7: HBhdc in each around (28)
-
The next round will create the thumb opening.
Round 8: HBhdc in first 11 sts, chain 3, skip 6 sts and HBhdc in next st, HBhdc in next 10 sts (22 HBhdc, 3 chains) -
Round 9: HBhdc in each stitch around, including the 3 chs at thumb opening (25)
-
Round 10: HBhdc in each stitch around (25)
-
Round 11: HBhdc decrease, HBhdc in each stitch back to start (24)
-
Round 12: HBhdc in each stitch around (24)
-
Round 13: HBhdc in each stitch around (24)
-
Round 14: Loosely sl st in each stitch around, join in first sl st and fasten off (24)
-
Edging the Thumb Opening
Join in any stitch along the thumb opening.
Round 1: Ch 1, evenly place 13 HBhdc around the opening, sl st to join in first HBhdc (13)
Round 2: Ch 1, HBhdc dec first 2 stiches, HBhdc in next 5 stitches, HBhdc dec, HBhdc in next 4 stitches, sl st to join in first HBhdc (11)
Round 3: Loosely sl st in each stitch around, join and fasten off (11) -
Button Band (make 2)
Ch 14, HBhdc in 2nd chain from hook, and in each chain to end, make 6 HBhdc in last chain, continue working the opposite side of the chain back to start, fasten off, leaving a lengthy tail for sewing the band onto the glove. Attach the straight end of the band along the inner edge of the glove; secure the rounded edge by sewing through both the band and glove when attaching the button. Allow some slack for stretching over the hand. Repeat these steps for the second glove, making sure the strap goes the opposite direction so you have a right and a left. Weave in all ends.
Large Adult
Palm circumference = 8" - 8.75" • Finished size = 8" around palm, 7" in length
-
Row 1: Ch 17, sc in 2nd chain from hook and in each chain across, turn (16)
-
Row 2: Working in back loops only - Ch 1, sc in first stitch and in each stitch across, turn (16)
-
Row 3 to Row 26: Repeat Row 2
Bring the ends of the cuff together and join by slip stitching through the Back Loops of Row 26 and the corresponding stitches of the beginning chain. -
The body of the glove will be worked in a spiral; do not join or turn your work. Use a marker to track rounds.
Round 1: Ch 1, sc in the end of the first row, HBhdc in the end of the next row and in each row back to start, do not join (26) -
Round 2: *HBhdc in next 12 stitches, make 2 HBhdc in next stitch*, repeat one time (28)
-
Round 3: Make 2 HBhdc in first stitch, HBhdc in each stitch back to start (29)
-
Round 4: Make 2 HBhdc in first stitch, HBhdc in each stitch back to start (30)
-
Round 5: Make 2 HBhdc in first stitch, HBhdc in each stitch back to start (31)
-
Round 6: Make 2 HBhdc in first stitch, HBhdc in each stitch back to start (32)
-
Round 7: HBhdc in each around (32)
-
Round 8: HBhdc in each around (32)
-
The next round will create the thumb opening.
Round 9: HBhdc in first 13 sts, chain 3, skip 7 sts and HBhdc in next st, HBhdc in next 11 sts (25 HBhdc, 3 chains) -
Round 10: HBhdc in each stitch around, including the 3 chs at thumb opening (28)
-
Round 11: HBhdc in each stitch around (28)
-
Round 12: HBhdc decrease, HBhdc in each stitch back to start (27)
-
Round 13: HBhdc in each stitch around (27)
-
Round 14: HBhdc in each stitch around (27)
-
Round 15: HBhdc in each stitch around (27)
-
Round 16: Loosely sl st in each stitch around, join in first sl st and fasten off (27)
-
Edging the Thumb Opening
Join in any stitch along the thumb opening.
Round 1: Ch 1, evenly place 14 HBhdc around the opening, sl st to join in first HBhdc (14)
Round 2: Ch 1, *HBhdc dec, HBhdc in next 5 stitches*, repeat between * one time, sl st to join in first HBhdc (12)
Round 3: Loosely sl st in each stitch around, join and fasten off (12) -
Button Band (make 2)
Ch 16, HBhdc in 2nd chain from hook, and in each chain to end, make 6 HBhdc in last chain, continue working the opposite side of the chain back to start, fasten off, leaving a lengthy tail for sewing the band onto the glove. Attach the straight end of the band along the inner edge of the glove; secure the rounded edge by sewing through both the band and glove when attaching the button. Allow some slack for stretching over the hand. Repeat these steps for the second glove, making sure the strap goes the opposite direction so you have a right and a left. Weave in all ends.
Abbreviations
- Herringbone Half Double Crochet (HBhdc)
- yarn over, insert hook into the stitch being worked, yarn over, draw through the stitch and the first loop on the hook, yarn over, draw through both loops on the hook.
- Herringbone HDC Decrease
- yarn over, insert hook into the stitch being worked, yarn over, draw through the stitch and the first loop on the hook, yarn over, insert hook into the next stitch, yarn over, draw through the stitch and the first loop on the hook, yarn over, draw through all loops on the hook to complete the stitch.
Your Recently Viewed Projects
Thanks for your comment. Don't forget to share!
Cheryl Y
Oct 31, 2017
Oh my Herringbone Crochet Fingerless Gloves! I love this stitch and now I can make fingerless gloves with it. This pattern is so well written and easy to understand and it's right here on this page. I'm happy to see there is a pattern for three different sizes so I don't have to figure it out. Thank you! These are a must make in my book. The fabric made with this stitch will be so warm and needed in the North. I also have to say that I just found the print tab under the more tab. Thank you, thank you for sharing this free crochet pattern.
Report Inappropriate Comment
Are you sure you would like to report this comment? It will be flagged for our moderators to take action.
Thank you for taking the time to improve the content on our site.