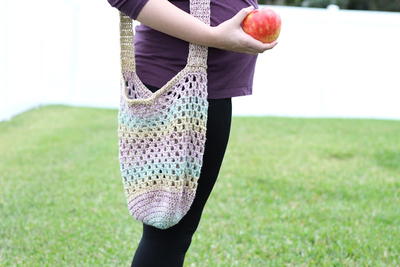
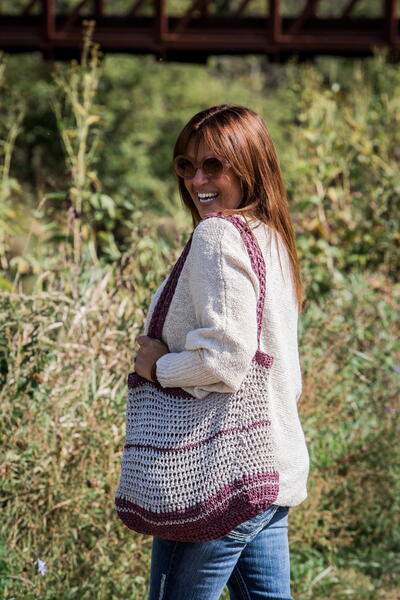
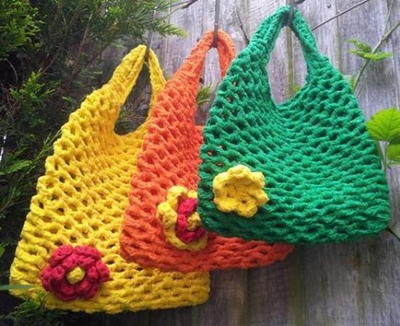
Slouchy Grab Bag
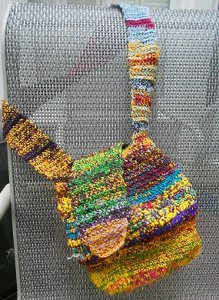
This Slouchy Grab Bag is perfect for all your daily errands. Just grab it as you walk out the door and go! This crochet bag pattern is made using recycled yarn by Darn Good Yarn. They create reasonably-priced, high quality yarn that helps women in India and Nepal. It's a great pattern to make if you'd like to crochet something using recycled materials.

Crochet HookH/8 or 5 mm hook
Yarn Weight(2) Fine (23-26 stitches to 4 inches)
SUPPLIES:
- 4 skeins of Darn Good Yarn’s Recycled Resolution Silk Yarn
- Hook: Size “H” crochet hooK
MY TIPS (Trial and Error):
Bag Bottom: If you want the bottom of your bag to be more stiff than floppy, use a skein of yarn that is on the thicker side. If you want a bag with a bottom that sags (like my bag), use a skein of yarn on the thinner side.
Bag Body: If you want the bag to be stiffer, use a thick-er skein of yarn. If you want a very floppy bag, use a thinner yarn. I personally continued with the thinner skein (that I had used to make the bottom) and worked up the body of the bag, then used a thicker yarn for the rest of the body. This gives the effect of the bag flopping/collapsing on itself while still maintaining a sturdy body that won’t collapse on you while you’re digging around in the bag.
Bag Strap and Flap: Use a thinner skein of yarn to produce a softer, more flexible strap and flap.
INSTRUCTIONS:
All stitches are double crochet (DC). All instructions are just suggestions.
BOTTOM: There is no exact science to crocheting a circle. For each round, the pattern will depend on the uniqueness of your yarn. The important thing is to frequently put your work down (yes, literally) to make sure it lays flat on its own. If it starts to show bumps or ripples, just frog it back and adjust the number of times you DC in each chain. Trust me, it’ll be okay. To ease your mind, here’s a rough example of how I made mine:
Row 1: Chain 3, slip stitch into chain fur-thest from hook to join in circle.
Row 2: [This may be used for a few rows, depending on your circle].
Double crochet (DC) twice in each chain. Repeat to end of row.
Row 3: (Mark the beginning of the row!)
[This may be used for a few rows, depending on your circle.]
DC in first two chains twice, then DC once in third chain. Repeat to end of the row.
Row 4: [This may be used for a few rows, depending on your circle.]
DC twice in first chain, then DC once in second chain. Repeat to end of row.
As the size of the circle increases, you’ll do rows with fewer and fewer “ DC twice in chain”. I stopped trying to count the pattern after a while, since the variations in the yarn (as well as the varia-tion in how tightly each person crochets) created spots where more or fewer “DC twice in chain” are needed to maintain an even, round bottom. It’s as unique as you!!!
Just keep crocheting in a circle until you have the bottom of the bag at the size you want. Then bind off your work. I’ve found that pulling the yarn through the first chain in what would begin the NEXT row creates a more uniform circle. Weave in the end now or just wait till the bag is done.
BODY: This is a bit tricky to start but not too bad. A perk of the sloppy bag is that its texture and color changes hide imperfections! Pick a spot (I started away from the bind off site) to pick up stitches.
Row 1: Pick up stitches by DC through the chain BELOW the final row/edge. This will allow you to crochet around the entire edge of the bot-tom piece (essentially creating a very thick, very strong seam). Picking up stitches this way creates a nice, rounded edge to the bottom of your bag, rather than a sharp cylindrical-like edge you might get from picking up stitches just along the outer edge of the circle.
Row 2-?: DC each stitch in entire row. Do this for as many rows as needed to make the main body of the bag as tall as you want. I didn’t count rows since I tend to crochet tightly and therefore my rows are shorter than the average bear. My “straight” portion of the body is about 6.5” high.
DECREASING: When you’re ready to start decreasing, once again it’s a personal preference on how you want it to look. My bag was done with the following:
STEP 1: DC once in first two chains, DC next to chains together. Repeat to end of row.
STEP 2: DC each stitch in entire row.
Then just repeat steps 1 and 2 until your bag has been reduced to the desired diameter. I recommend bind-ing off after a “Step 1” row to prevent the top from resembling a tube.
STRAP: My shoulder strap was 10 stitches wide. You may prefer one that has more or fewer stitches. It’s totally up to you! Pick a spot to start (once again, I chose a spot away from the bind off). You can either pick up stitches by DC into the top row of the bag or DC into the chain BELOW the final row.
Row 1: Pick up the desired number of stitches.
Chain 1 (or 2, whatever gives the smoothest edge for you), turn.
Row 2: DC the entire row. Chain 1 (or 2), turn.
Repeat the rows until the strap is your desired length.
Line up the strap with the opposite side of the bag. Attach with DC into the corresponding stitches in the top row on that side of the bag. Bind off. Weave in ends now or later.
FLAP: The flap for the bag is crocheted between the two straps, on one side of the bag.
Row 1: Pick up all stitches between the two straps using DC. Chain 1 (or 2, whatever gives the smoothest edge for you), turn.
Row 2-?: DC entire row. Chain 1 (or 2), turn.
Repeat until flap is desired length.
DECREASING: When you’re ready to star decreasing, you can make the tip of the flap as blunt or narrow as you would like.
Step 1: DC first two stitches together, DC across row to end.
Step 2: Turn (don’t chain 1 or 2), repeat Step 1.
Continue until you’re ready to bind off.
Weave in ends. ENJOY!
Check out Darn Good Yarn's Company profile page for additional information.
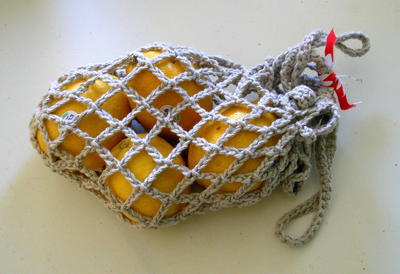
Read NextCrochet Produce Bag
Your Recently Viewed Projects
Thanks for your comment. Don't forget to share!
czoll71 5964930
Feb 27, 2013
I use recycled yarn and make "plarn" all the time...I normally finish 1-2 projects made with recycled materials each week...
lnance47 7002199
Feb 26, 2013
Our Arts & Crafts Group in our local hospital auxiliary makes tote bags from recycled grocery bags and newspaper bags. The "yarn" is made by the special needs students who attend school in our school district. See the article attached http://capegazette.villagesoup.com/p/trashed-bags-get-new-life-in-beebe-gift-shop/951419
dawnybinlv
Feb 26, 2013
never have used recycled yarn wouldn't know how to go about making it work so to speak that would be a good lesson to learn :D
beachgirl vb
Feb 26, 2013
Why does recycled yarn cost so much? (I hope that's not a dumb question.)
babsetown 3285196
Feb 26, 2013
I love using recycled products in my crocheting! I've made bags galore with grocery bags, newspaper bags, and I also love using yarn made from t-shirts. They have a nice "give" to them and cost virtually nothing.
Report Inappropriate Comment
Are you sure you would like to report this comment? It will be flagged for our moderators to take action.
Thank you for taking the time to improve the content on our site.