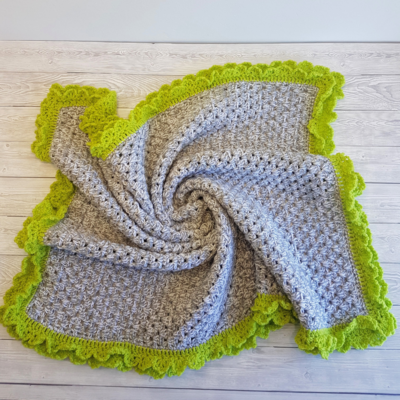
Patriotic Crochet Granny Square Throw
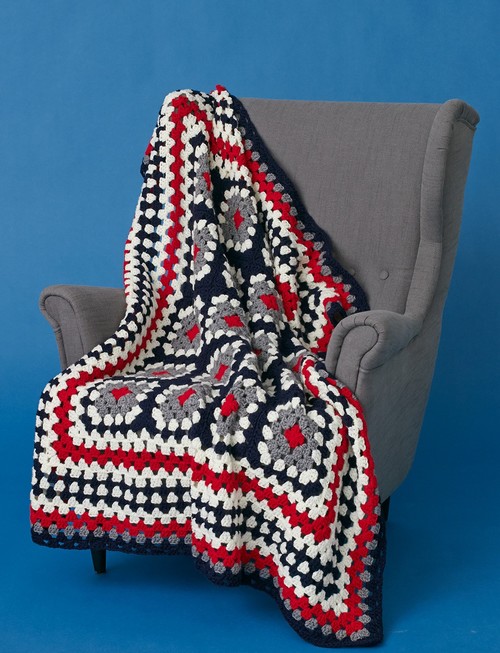
When learning how to crochet, the granny stitch is a pretty typical starting point. Once youve mastered that, you can move on to more complicated crochet stitches. But now you can use your granny stitch skills in new and unique way! The Patriotic Crochet Granny Square Throw creates a granny square motif within the center and then uses the stitch to create a border. Its a fun twist on a classic pattern!

Crochet HookI/9 or 5.5 mm hook
Yarn Weight(4) Medium Weight/Worsted Weight and Aran (16-20 stitches to 4 inches)
SIZE:
Approx 51″ x 57″ [129.5 x 144.5 cm].
MATERIALS:
Caron United Yarn: Contrast A Aran (06002) 3 skeins, Contrast B Soft Grey Heather (064008) 2 skeins, Contrast C Red (06008) 2 skeins, Contrast D Navy (06014) 3 skeins.
Size U.S. I/9 (5.5 mm) crochet hook
GAUGE:
12 dc and 6 rows = 4″ [10 cm]. Center Granny Motif = Approx 7″ [18 cm] square.
NOTES:
Ch 3 at beg of rnd counts as dc throughout.
CENTER SECTION:
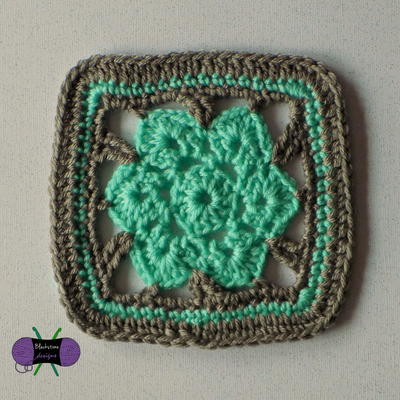
Center Granny Motif (make 20).
With C, ch 4. Join with sl st to first ch to form a ring.
1st rnd: Ch 3. 2 dc in ring. (Ch 2. 3 dc) 3 times in ring. Ch 2. Join with sl st to top of ch 3. Fasten off.
2nd rnd: Join B with sl st to any ch-2 sp. Ch 3. (2 dc. Ch 2. 3 dc) in same sp as last sl st. *Ch 1. (3 dc. Ch 2. 3 dc) in next ch-2 sp. Rep from * twice more. Ch 1. Join with sl st to top of ch 3.
3rd rnd: Sl st in each of next 2 dc and next ch-2 sp. Ch 3. (2 dc. Ch 2. 3 dc) in same sp as last sl st. Ch 1. 3 dc in next ch-1 sp. Ch 1. *(3 dc. Ch 2. 3 dc) in next ch-2 sp. Ch 1. 3 dc in next ch-1 sp. Ch 1. Rep from * twice more. Join with sl st to top of ch 3. Fasten off
4th rnd: Join A with sl st to any ch-2 sp. Ch 3. (2 dc. Ch 2. 3 dc) in same sp as last sl st. (Ch 1. 3 dc in next ch-1 sp) twice. *Ch 1. (3 dc. Ch 2. 3 dc) in next ch-2 sp. (Ch 1. 3 dc in next ch-1 sp) twice. Rep from * twice more. Ch 1. Join with sl st to top of ch 3. Fasten off.
5th rnd: Join D with sl st to any ch-2 sp. Ch 3. (2 dc. Ch 2. 3 dc) in same sp as last sl st. (Ch 1. 3 dc in next ch-1 sp) 3 times. *Ch 1. (3 dc. Ch 2. 3 dc) in next ch-2 sp. (Ch 1. 3 dc in next ch-1 sp) 3 times. Rep from * twice more. Ch 1. Join with sl st to top of ch 3. Fasten off.
With D, join Center Granny Motifs into 4 Strips, each 5 Motifs long. Join Strips tog. Center Section after joining Motifs should measure approx 28″ x 35″ [71 x 89 cm].
EDGING
1st rnd: (RS). Join A with sl st in top left corner ch-2 sp of Center Section. Ch 3. (2 dc. Ch 2. 3 dc) in same sp as last sl st.* (Ch 1. 3 dc in next ch-1 sp) 4 times. Ch 1. 3 dc in next joining sp.* Rep from * to * twice more across top of Center Section. (Ch 1. 3 dc in next ch-1 sp) 4 times. Ch 1. (3 dc. Ch 2. 3 dc) in next corner ch-2 sp. Rep from * to * 4 times down side of Center Section. (Ch 1. 3 dc in next ch-1 sp) 4 times. Ch 1. (3 dc. Ch 2. 3 dc) in next corner ch-2 sp. Rep from * to * 3 times across bottom of Center Section. (Ch 1. 3 dc in next ch-1 sp) 4 times. Ch 1. (3 dc. Ch 2. 3 dc) in next corner ch-2 sp. Rep from * to * 4 times up side of Center Section. Ch 1. Join with sl st to top of ch 3.
2nd rnd: Sl st in each of next 2 dc and next ch-2 sp. Ch 3. (2 dc. Ch 2. 3 dc) in same sp as last sl st. [*Ch 1. 3 dc in next ch-1 sp. Rep from * to next corner ch-2 sp. Ch 1. (3 dc. Ch 2. 3 dc) in next corner ch-2 sp] 3 times. **Ch 1. 3 dc in next ch-1 sp. Rep from ** to first ch-2 sp. Ch 1. Join with sl st to top of ch 3. Fasten off.
3rd rnd: Join C with sl st in first corner ch-2 sp. Ch 3. (2 dc. Ch 2. 3 dc) in same sp as last sl st. [*Ch 1. 3 dc in next ch-1 sp. Rep from * to next corner ch-2 sp. Ch 1. (3 dc. Ch 2. 3 dc) in next corner ch-2 sp] 3 times. **Ch 1. 3 dc in next ch-1 sp. Rep from ** to first ch-2 sp. Ch 1. Join with sl st to top of ch 3.
4th rnd: With C, as 2nd rnd.
5th and 6th rnds: With A, as 3rd and 4th rnds. Fasten off.
7th rnd: With D, as 3rd rnd. Fasten off.
8th rnd: With A, as 3rd rnd. Fasten off.
9th rnd: With D, as 3rd rnd. Fasten off.
10th and 11th rnds: With A, as 3rd and 4th rnds. Fasten off.
12th and 13th rnds: With C, as 3rd and 4th rnds. Fasten off.
14th rnd: With B, as 3rd rnd. Fasten off.
15th and 16th rnds: With D, as 3rd and 4th rnds. Fasten off.
Your Recently Viewed Projects

Thanks for your comment. Don't forget to share!
Delphine Bryant
Aug 07, 2018
I never get tired of looking at patterns that use granny squares. They are so versatile from the design and how it is assembled to the colors that can be used. This is a pretty patriotic design that would be loved by all. If you have a family member that served in any branch of the military they would love this.
Morehouse17
Jul 21, 2018
I have been around a while and I have seen the granny square assembled many ways to achieve the final result. I love the idea that first there are motifs joined together and finished in a great big granny square. I really like this design.
Report Inappropriate Comment
Are you sure you would like to report this comment? It will be flagged for our moderators to take action.
Thank you for taking the time to improve the content on our site.