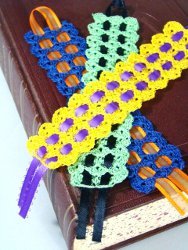
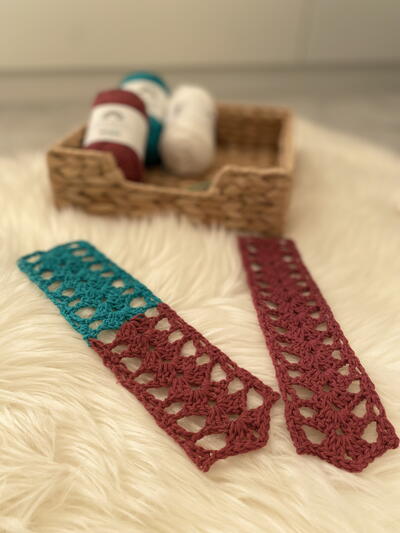
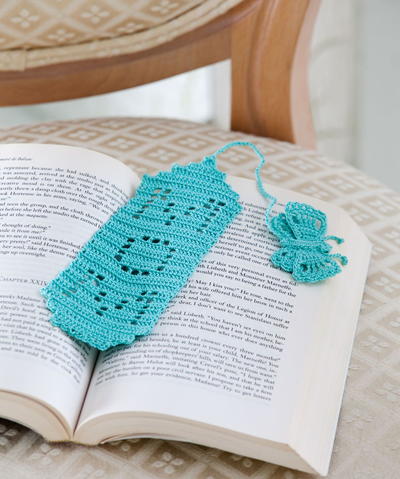
Bookmark for Mom

There's nothing quite like relaxing at home with a good book. The Bookmark for Mom is a great gift idea for Mother's Day that will make this relaxing hobby even more enjoyable. Use crochet thread in her favorite color to complete this free crochet pattern. A cute butterfly tassel adds the perfect finishing touch. It's a perfect springtime pattern that she will cherish forever.

Crochet Hook8 or 1.5 mm hook (steel)
Yarn Weight(0) Lace (33-40 stitches to 4 inches). Includes crochet thread.
MATERIALS:
- AUNT LYDIA’S® Classic Crochet Thread size 10: 1 ball 450 Aqua
- Susan Bates® Crochet Hook: 1.4 mm [US 8] steel hook
- Tapestry Needle
- CLICK HERE FOR THE PATTERN PDF
Gauge/Tension:
GAUGE: 11 sts = 1” (3 cm); 4 rows = 1” (3 cm) in dc. CHECK YOUR GAUGE. Use any size hook to obtain the gauge.
SPECIAL ABBREVIATIONS
dc3tog: *Yarn over, insert hook in next st, yarn over, draw yarn through st, yarn over, draw yarn through 2 loops on hook; repeat from * twice, yarn over, draw yarn through 4 loops on hook.
HOW TO READ PATTERN
Each solid square is equal to a “block” of “dc in next dc, dc in next 2 sts or ch-2 space, dc in next dc”. Each open square is equal to a “space” of “dc, ch 2, skip next 2 sts, dc.” The dc at the end of each square also counts as the first dc of the next block or space. For example, a block followed by a space = dc in next 4 sts, ch 2, skip next 2 sts, dc in next dc.
BOOKMARK
Starting at bottom, ch 30.
Row 1 (Right Side): Dc in 4th ch from hook, dc in each ch across 9 blocks made), turn.
Row 2: Ch 3 (counts as dc here and throughout), dc in next 3 dc (block made), *ch 2, skip next 2 sts, dc in next 7 dc (1 space and 2 blocks made); repeat from * once, ch 2, skip next 2 sts, dc in last 4 dc (1 space and 1 block made), turn.
Rows 3-24: Continue to work in blocks and spaces following chart.
Row 25: Slip st in each of first 4 sts (decrease made), ch 3, dc in each st across to last 4 dc, turn, leaving remaining sts unworked (decrease made) (7 blocks made), turn.
Rows 26-28: Repeat Row 25 (1 block at end of last row). Fasten off.
Bottom Trim
Row 1: With right side facing, working across opposite side of foundation ch, join thread with slip st in 4th ch, ch 3, dc in each of next 21 ch sts (7 blocks made), turn, leaving
remaining sts unworked.
Row 2: Slip st in each of first 4 sts (decrease made), ch 3, dc in each of next 15 dc, turn, leaving remaining sts unworked.
Row 3: Ch 1, sc in first dc, *ch 3, skip next dc, sc in next dc; repeat from * across—7 ch-3 spaces.
BUTTERFLY
Head and Body (make 2)
Ch 10.
Row 1: Sc in 2nd ch from hook, sc in next 8 ch (slip st, 3 hdc, slip st) in last ch (head), working across opposite side of foundation ch, slip st in each ch across. Fasten off and set aside.
Large Wing (make 2)
Ch 5.
Row 1 (right side): Sc in 2nd ch from hook and in each ch across, turn—4 sc.
Row 2: Ch 1, 2 sc in first sc, sc in next 2 sc, 2 sc in last sc, turn—6 sc.
Row 3: Ch 1, sc in each sc across, turn.
Row 4: Ch 5, (counts as tr, ch 1), skip first sc, tr in next sc, *ch 1, tr in next sc; repeat from * across, turn—5 ch-1 spaces.
Edging
Round 1: Ch 1, sc in each tr and ch-1 space across; working across side edge of wing, work 3 sc in next row-end tr, sc in each of next 3 row-end sc, working across bottom edge of foundation ch, sc in each ch across, working across other side edge, sc in each of next 3 row-end sc, 3 sc in next row-end tr, join with slip st in first sc.
Row 2: Ch 1, sc in first sc, *ch 3, skip next sc, sc in next sc; repeat * 4 more times. Fasten off and set aside. Fasten off and set aside.
Large Wing (make 2)
Ch 3.
Row 1 (wrong side): Sc in 2nd ch from hook and in next ch, turn—2 sc.
Row 2: Ch 1, 2 sc in each sc across, turn—4 sc.
Row 3: Ch 4 (counts as dc, ch 1), skip first sc, dc in next sc, *ch 1, dc in next sc; repeat from * across, turn—3 ch-1 spaces.
Edging
Round 1: Ch 1, sc in each dc and ch-1 space across; working across side edge of wing, work 2 sc in next row-end dc, sc in each of
next 2 row-end sc, working across bottom edge of foundation ch, sc in each ch across, working across other side edge, sc in each of next 2 row-end sc, 2 sc in next row-end dc, join with slip st in first sc.
Row 2: Ch 1, sc in first sc, *ch 3, skip next sc, sc in next sc; repeat * twice. Fasten off and set aside.
Antennae
Ch 25. Fasten off. Make an overhand knot on both ends and set aside.
Right Side Assembly
Row 1: With right side facing, hold one large wing with smaller end up. Join thread in first sc, ch 1, sc in first sc, sc in next 2 sc. With right side facing, place small wing behind large wing; insert hook through 4th sc of large wing and first sc of small wing, working through double thickness, work 2 sc in same st, sc in next sc of small wing. Fasten off.
Left Side Assembly
Row 1: With right side facing, hold other small wing with smaller end up. Join thread in first sc, ch 1, sc in first sc. With right side facing, place remaining large wing behind small wing; insert hook through 2nd sc of small wing and first sc of large wing, working through double thickness, work 2 sc in same st, sc in next 3 sts of large wing. Fasten off.
FINISHING
With tapestry needle, and right sides facing, placing both large wings on same end, sew wings together across last row of wings. Place one head and body on both sides of assembled wings (right side facing out and with head at large wing end) and sew in place.
Before head is sewn together, slip center of antennae between head pieces and complete sewing heads together.
With right side of bookmark facing, join thread to first st on last row, ch 3, dc3tog over next 3 dc, ch 50, slip st to bottom of butterfly’s body.
Fasten off. Weave in ends.
ABBREVIATIONS: ch = chain; dc = double crochet; sc = single crochet; slip st = slip stitch; st(s) = stitch(es); [] = work directions given in brackets the number of times specified; * or ** = repeat whatever follows the * or ** as indicated.
Read NextAnette Bookmark
Your Recently Viewed Projects
Thanks for your comment. Don't forget to share!
Morehouse17
Apr 30, 2018
I almost did not find the chart needed to make this bookmark. I could not see the forest for the trees as my Grandma used to say. This type of crochet is called filet if not mistaken and I love to make projects like these. Thanks for the link to the red heart pattern.
Delphine Bryant
Apr 29, 2018
The directions for this book mark has the chart so that if you are wanting to make this but not for MOM, the alphabet is provided so that you can alter the design. I want one in my initials and I know my friends in the book club would like one in their initials also.
Zeemer
Apr 27, 2018
Wow. What a beautiful crochet project - a bookmark. You can make several of these bookmarks then give out to friends and classmates.
Stephanie Hantz
May 04, 2017
I was really going to try this but I was also thinking that I would like to one each for my sisters! But I thought of all the work I would have to do to change the letters. Then I read JaneEKs comment about all the letters included! So, I am definitely adding this to my to do list! Now if it only came with a humming bird too!
Hippie Chick
May 04, 2017
Before you attempt to start this project be sure the read the section entitled HOW TO READ PATTERN. You will be totally lost if you do not. Refer back to it often and especially during each row. The pattern is a bit confusing but if you follow and understand that one section then it will be a breeze.
JaneEK
Apr 17, 2017
Do yourself a favor and dont even try to read this pattern on this page. Look at the list of materials and click on the highlighted Pattern link. This will take you to the Aunt Lydias .pdf version. Not only is the photo larger, but there are charts for both the Mom as well as a complete alphabet. Very much appreciated!
bronte30032 649597 0
Apr 21, 2013
I am a great crocheter but I am totally lost after row 2-help!
creativity2infinit y
Apr 16, 2013
Brenda30 I had the same problem, then I read you comment and found the answer, thanks.
Report Inappropriate Comment
Are you sure you would like to report this comment? It will be flagged for our moderators to take action.
Thank you for taking the time to improve the content on our site.